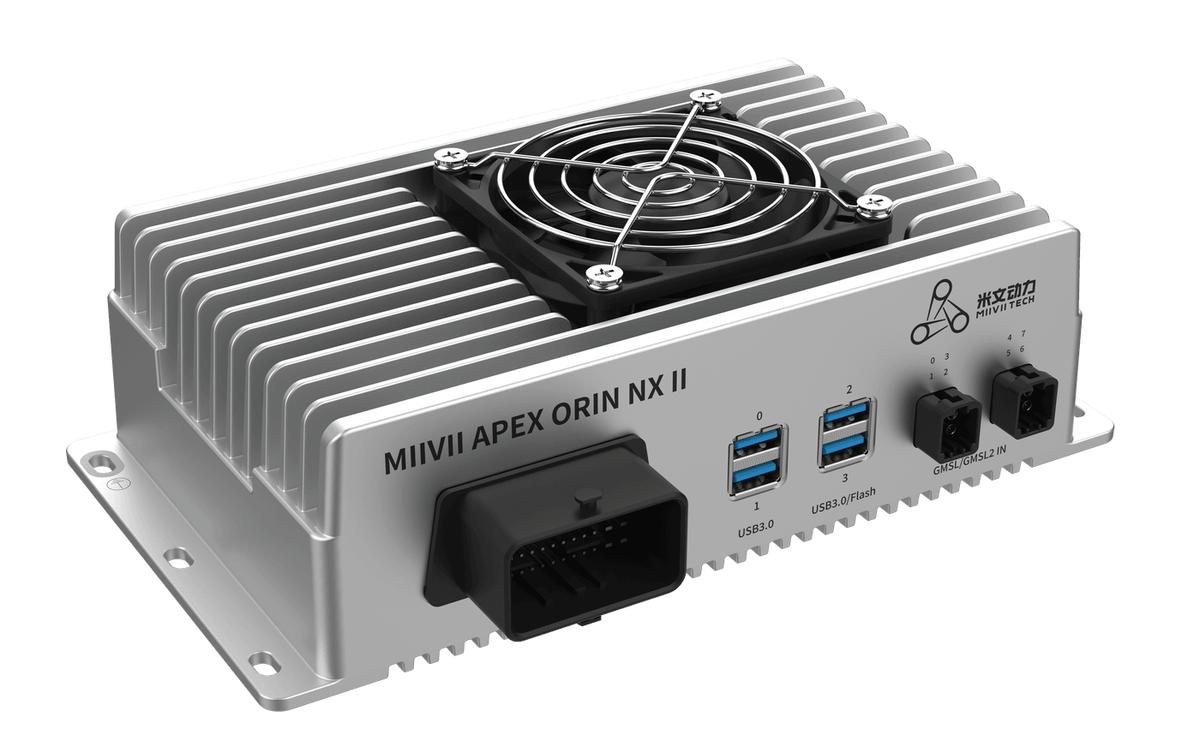
APEX ORIN NX II SSD Installation and Replacement#
SSD Installation and Replacement:#
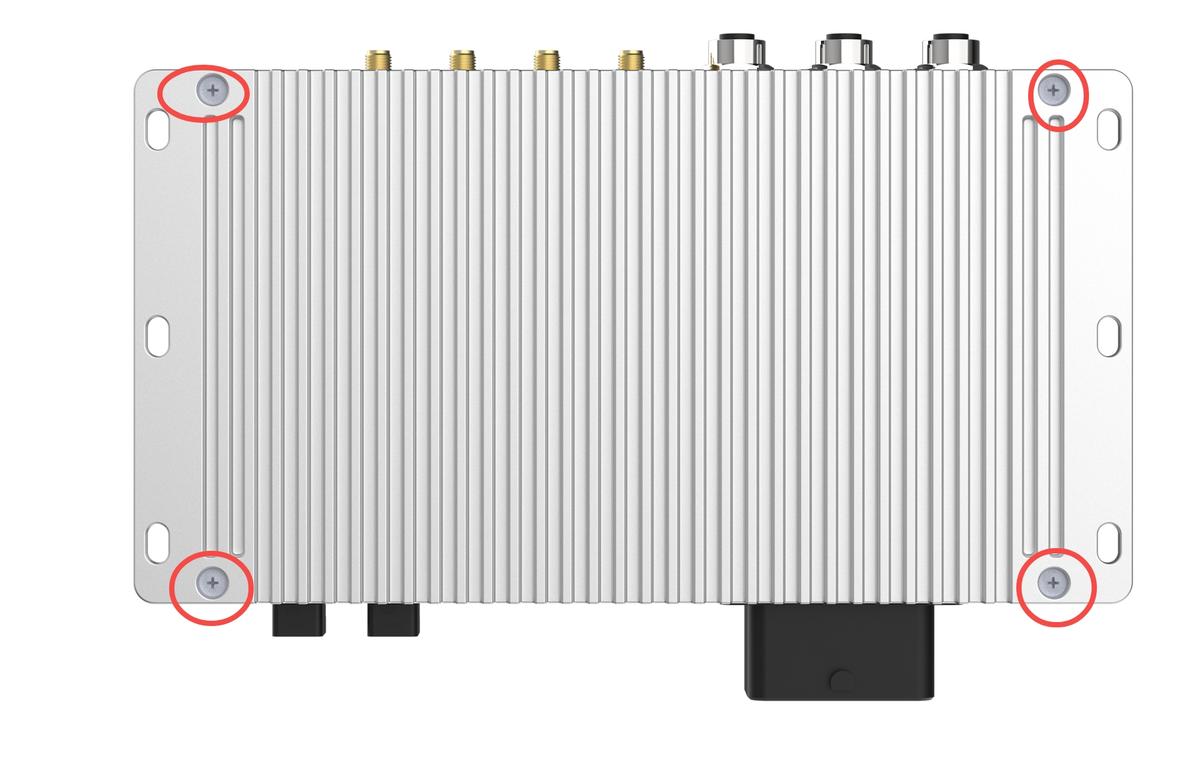
Enclosure Disassembly:#
Remove the screws on the bottom.
Installation Steps:#
Install the SSD in the socket shown in the illustration and secure it with one M3*6 Phillips screw with thread-locking adhesive.
Attach a 2.5 mm thick thermal pad to the SSD.
Reference Images:#
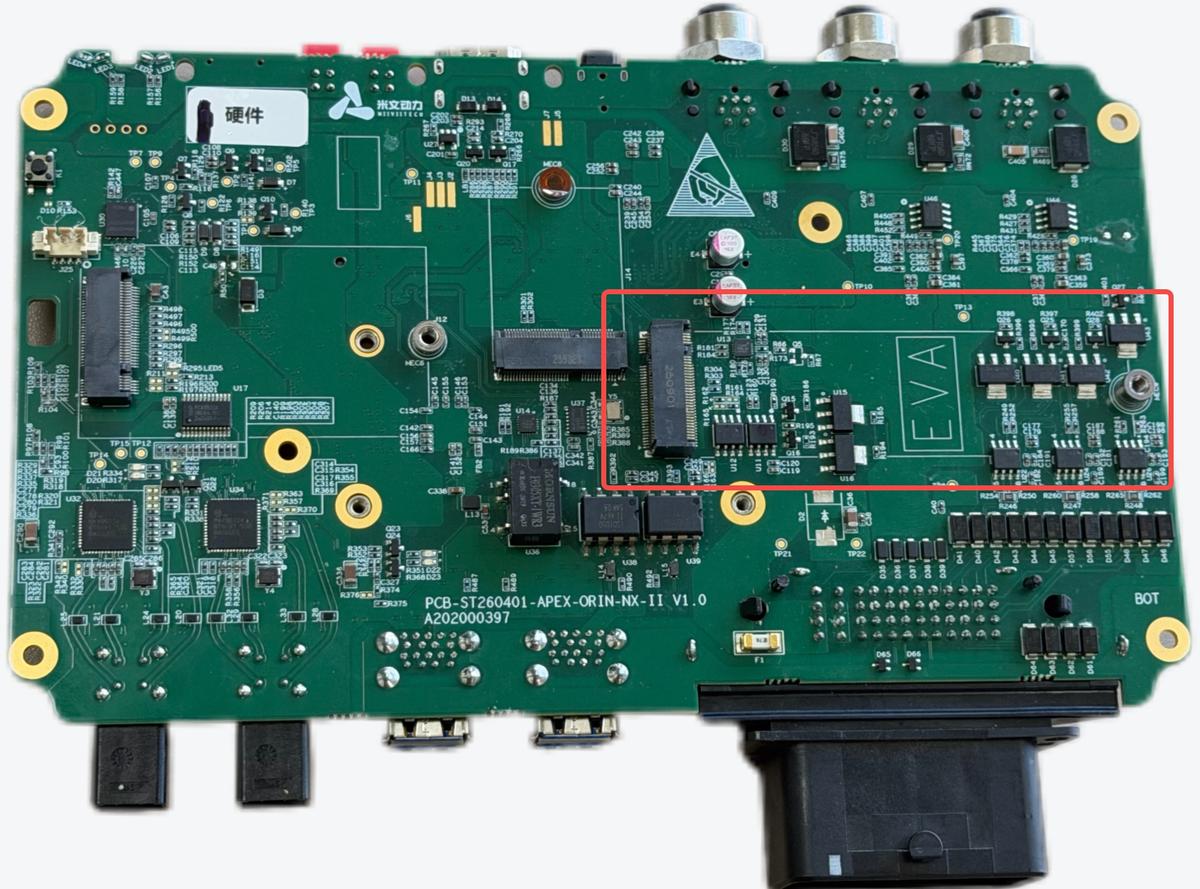
Required Accessories:
SSDx1
M3*6 Phillips screw with thread-locking adhesive ×1
2.5 mm thermal pad ×1
Notes:#
Install a thermal pad for heat dissipation.
SSD Troubleshooting#
Issue 1: The SSD does not mount automatically after startup.#
Solution:#
Check the Physical Connection
1) Confirm that the SSD is fully inserted into the M.2 slot or connected to the external interface (such as USB/SATA).
2) For an external SSD, check the connector for oxidation or a loose connection.
Verify Basic SSD Operation
1) Remove the SSD, install it in an enclosure, and connect it to another device such as a computer.
2) If the other device detects it, back up the data and reformat it as ext4.
3) If the other device cannot detect it, the SSD hardware is damaged and must be replaced.
Check Whether the System Detects the SSD
1) Open a terminal and run the following command to check whether the SSD is detected:
 # List all storage devices
lsblk
2) If the SSD does not appear, the driver may not be loaded or the hardware may be faulty.
3) If the SSD appears but is not mounted, continue to the next check.
Check the Partition and File System
1) Run the following command to view partition information:
# List disk partitions
sudo fdisk -l
2) If the partition table is abnormal or the file system type is incorrect, such as NTFS, reformat the partition:
# Replace with the actual partition name, for example sda1
sudo mkfs -t ext4 /dev/sdXn
Try Mounting Manually
1) Create a mount directory and mount the partition manually:
sudo mkdir /mnt/ssd
sudo mount /dev/sdXn /mnt/ssd
2) If mounting succeeds, repair the automatic mounting configuration by checking /etc/fstab.
3) If mounting fails, collect logs and submit them for analysis. See Technical Support Guidance.
Issue 2: The SSD Is Mounted but Cannot Be Read or Written#
Solution:#
Check Mount Point Permissions
1) Run the following command to check the mount directory permissions:
# Check permissions and ownership
ls -ld /mnt/ssd
2) If permissions are insufficient, change the permissions to allow reading and writing:
 # Set read/write permissions
sudo chmod 755 /mnt/ssd
 # Change ownership
sudo chown username:group /mnt/ssd
Verify the File System Type
1) Run the following command to check the file system type:
# Check the type, such as ext4 or NTFS
sudo blkid /dev/sdXn
2) If the file system is incompatible, such as NTFS, back up the data and reformat it as ext4.
Check File System Health
1) Unmount the partition and run the repair command:
sudo umount /dev/sdXn
 # Repair errors automatically
sudo fsck -y /dev/sdXn
2) If the repair fails, the SSD may have physical bad blocks. Replacement is recommended.
Test Read and Write Operations
1) Create a test file to verify operation:
# Write a test file
echo "test" > /mnt/ssd/test.txt
# Read the test file
cat /mnt/ssd/test.txt
2) If writing or reading fails, check SSD health using smartctl or replace the drive.
Technical Support Guidance#
Required Information:
1) SSD model and interface type, such as M.2 NVMe or SATA;
2) Screenshots of terminal output, such as lsblk and fsck results;
3) Log files generated with the following command:
curl -sSL https://doc.miivii.com/scripts/run_miivii_diagnostic.sh | bash -s ssd