APEX AD10 External GPS Time Synchronization#
Instructions for using the external GPS time synchronization feature#
The main purpose of SYNC IN is to accept GPS PPS signal input. Cooperate with the GPRMC information received by the serial port to achieve the timing of the system through the external GPS.
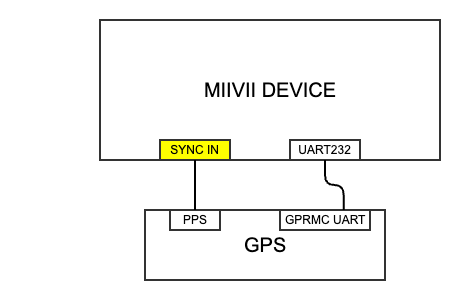
Operation Instructions#
Modify the time synchronization mode in “MIIVII SETTINGS” to external GPS.
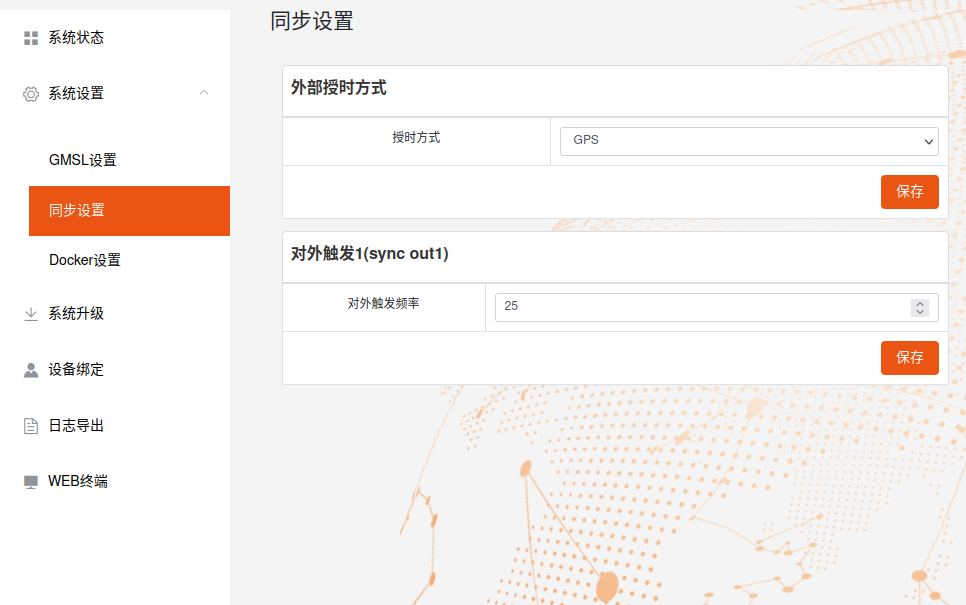
By default, /dev/ttyUART_232_B is used for time synchronization. If you need to modify the node for time synchronization, follow the instructions below.
cd /opt/miivii/config/sync/
vim gpsd

#Modify the following lines in the file content to the desired device node.
DEVICE="/dev/ttyTHS4"

#Modify the serial port baud rate to 115200.
GSPD_OPTIONS="-b -n -s 115200"
Verification Method#
#Modify the system time.
sudo date -s 12:12

#Wait for about 1 minute.
#Check if the system time automatically changes to the current time. If the system time can be updated to the current time, the GPS function is normal. If the system time cannot be updated to the current time, the GPS function is abnormal.
Operation Instructions#
Modify the time synchronization mode in “MIIVII SETTINGS” to external GPS.
By default, /dev/ttyUART_232_B is used for time synchronization. If you need to modify the node for time synchronization, follow the instructions below.
cd /opt/miivii/config/sync/
vim gpsd

#Modify the following lines in the file content to the desired device node.
DEVICE="/dev/ttyTHS4"

#Modify the serial port baud rate to 115200.
GSPD_OPTIONS="-b -n -s 115200"
Verification Method#
#Modify the system time.
sudo date -s 12:12

#Wait for about 1 minute.
#Check if the system time automatically changes to the current time. If the system time can be updated to the current time, the GPS function is normal. If the system time cannot be updated to the current time, the GPS function is abnormal.
Troubleshooting of GPS timekeeping issues#
Phenomenon: When using an external GPS to provide time synchronization for the Miwen device, the time synchronization fails.#
Check item 1: Check hardware connections#
Step 1: Confirm whether the wiring method is correct#
Wiring method reference:https://doc.miivii.com/Apex-AD10-User-Manual-CH/wiki/Apex-AD10-%E5%A4%96%E9%83%A8GPS%E6%8E%88%E6%97%B6.html
(Time synchronization is performed using /dev/ttyUART_232_B by default)
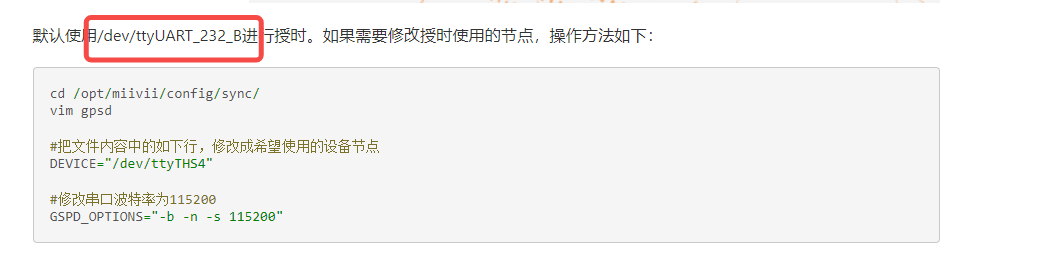
If the wiring method is correct, proceed to “Step 2”.
If the wiring method is incorrect, it is necessary to modify the wiring method.
Step 2: Cross-validation (if conditions permit)#
If you have another device or other devices that can be connected to an external GPS, cross-validation can be performed.
If other devices also cannot be time-synchronized by GPS, check for issues with the GPS itself.
If other devices can be time-synchronized, you need to perform “Troubleshooting Item 2: Check the GPS antenna”.
Check item 2: Inspect the GPS antenna#
Step 1: Check whether the antenna is properly connected and whether its placement position is correct.#
Install the GPS antenna correctly and place it in an outdoor location without obvious obstructions.
Check if the antenna has physical damage or poor connections.
If possible, try replacing it with a GPS antenna that is known to work properly to rule out issues with the antenna itself.
If the antenna connection is abnormal, it is necessary to adjust the antenna connection/placement position.
If the antenna connection is normal and the placement position is correct, execute “Troubleshooting Item 3: Check Configuration”.
Check Item 3: Check Configuration#
Step 1: Check if the websetting time synchronization mode is correct#
Open websetting and check whether the selected time synchronization method is GPS.
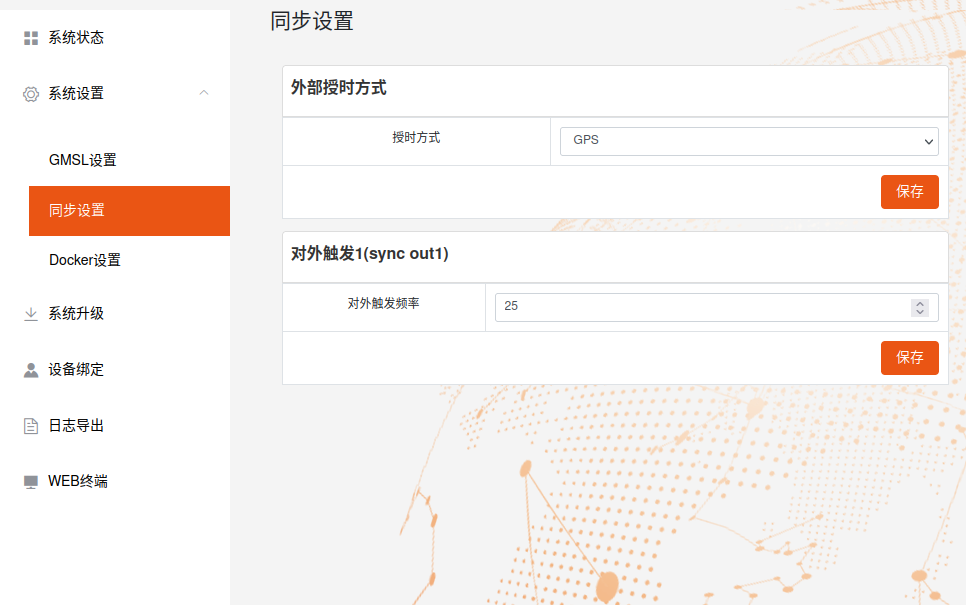
If it is not GPS, you need to select “GPS”.• If it is GPS, you need to perform “Step 2”.
Step 2: Check whether the serial port baud rate matches the external GPS.#
Use the stty command to view serial port configuration information
stty -F /dev/ttyS0 -a
/dev/ttyS0 needs to be selected according to its own serial port node. 2. Confirm the external GPS baud rate. 3. Confirm whether the baud rates of steps 1 and 2 are consistent.
If the baud rates are inconsistent, they need to be modified to the same baud rate.• If the baud rates are consistent, execute “Troubleshooting Item 4: Check chrony synchronization status”.
Check item 4: Check the chrony synchronization status#
Step 1: Use the chronyc sources command to check the status of the current clock source#

Among them, the PPS signal must be in the #* state, indicating that chrony has selected PPS as the main clock source. The GPSD state is #?, indicating that chrony considers GPSD to be normal. The normal state diagram is as follows:

If no PPS signal is received, the connecting cable needs to be checked.
If a PPS signal is received, execute: “Troubleshooting Item 5: Check the PPS signal input status”.
Check item five: Check the PPS signal input status#
Step 1: Confirm the input status of the PPS signal#
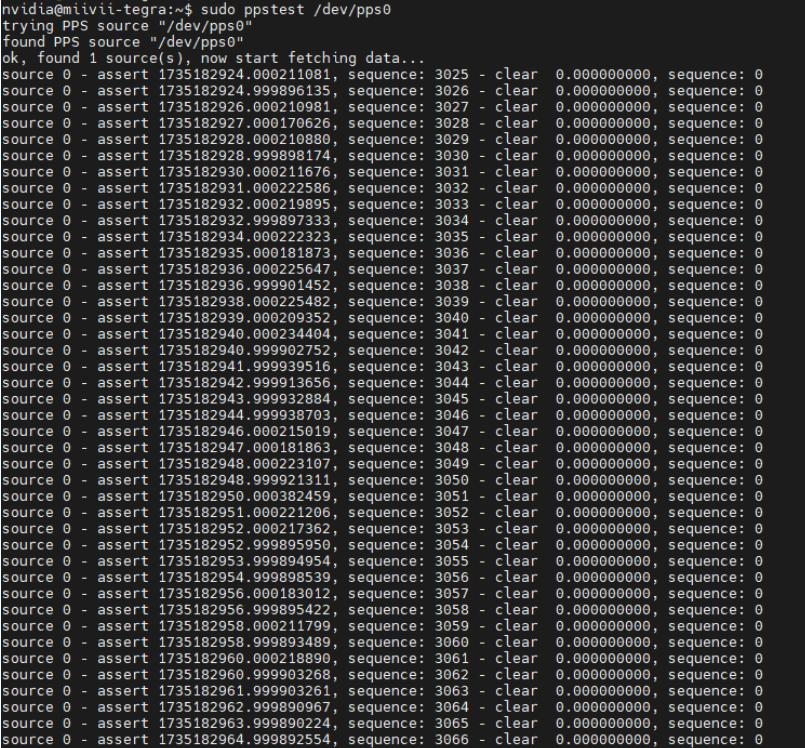
Using ppstest to obtain PPS signals: Enter the command#
sudo ppstest /dev/pps0.
If the signal is normal, the following information will be returned.#
The interval of the PPS signal can be calculated from the assert data (UNIX timestamp) in the returned information, which is normally 1 second.#
When the PPS wiring is disconnected (no PPS signal input), the diagram is as follows:
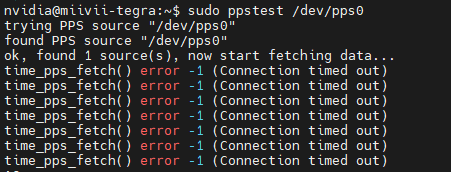
If the signal interval is incorrect, it is necessary to check whether the pps itself is normal.
If the signal interval is correct, execute “Check Item 6: Check GPS Status”.
Check item six: Check GPS status#
Step 1: Check the GPS status#
Enter the command gpsmon. In the pop-up message box, you can see the basic information of GPS, including positioning, time, PPS, etc.:
The diagram of the normal state is as follows:
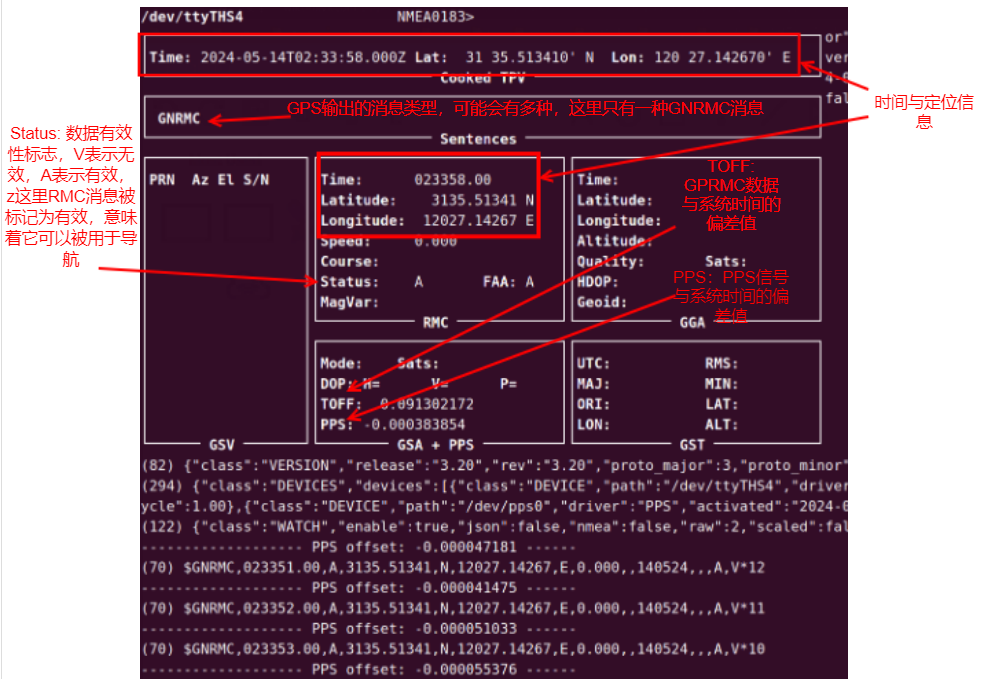
When the GPRMC connection is disconnected (no GPRMC signal input), the diagram is as follows:

If the GPS status is abnormal, it is necessary to check the GPRMC wiring.
If the GPS status is normal but GPS time synchronization still cannot be achieved, execute “Troubleshooting Item 7: Re-flash the image to verify if it is caused by the software environment”.
Check item 7: Re-flash the image to verify if it is caused by the software environment#
Step 1: Flash the image#
Method for flashing the image: https://doc.miivii.com/Apex-AD10-User-Manual-CH/wiki/Apex-AD10-%E5%9B%BA%E4%BB%B6%E7%83%A7%E5%86%99.html。
After flashing the image, if the serial port can communicate normally, it indicates that the issue is caused by the system software environment, and the customer needs to check the software environment themselves.
If synchronization still fails after flashing the image, execute “Step 2”.
Step 2: Capture the log#
After connecting the device to the external network, open the terminal and enter:
curl -sSL https://doc.miivii.com/scripts/run_miivii_diagnostic.sh | bash -s gps-timing
And export the logs and the files under /var/log, upload them to the fault work order, and hand them over to Miwen technical support.