APEX AD10 CAN Usage#
Instructions for Using CAN Interface#
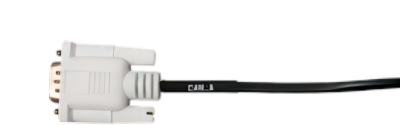
CAN DB9 Port Pin Definition
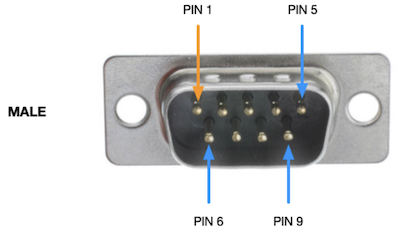
Pin |
Signal |
|---|---|
2 |
CAN_A_L |
7 |
CAN_A_H |
Function vs Device Node#
Function |
Definition |
Device Node |
|---|---|---|
CAN_A |
Orin CAN0 |
can0 |
CAN_B |
Orin CAN1 |
can1 |
CAN_C |
Expanded CAN |
can2 |
CAN_D |
Expanded CAN |
can3 |
CAN_E |
Expanded CAN |
can4 |
Method of Application#
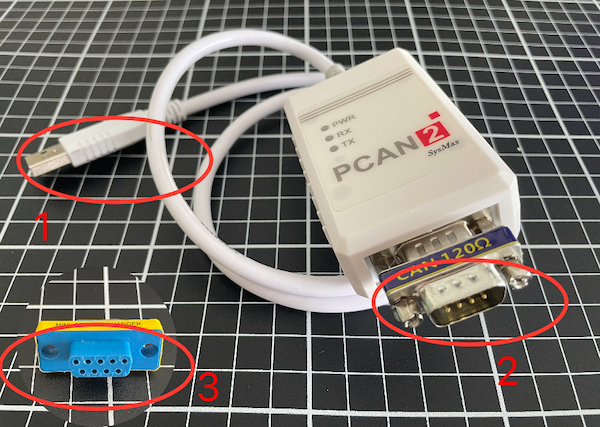
Use connector 1, connect to PC.
Use connector 2, connect to female-female cross connector 3.
Use connector 3, connect to the DB9 CAN want to use.
CAN Configuration#
Preparation#
Device
#Load Driver
sudo modprobe can
sudo modprobe can_raw
sudo modprobe mttcan
#Configuration parameters (using can0 as an example)
sudo ip link set can0 up type can bitrate 500000 dbitrate 5000000 sjw 4 restart-ms 1000 berr-reporting on fd on
PC
#Install
sudo apt-get install can-utils -y

#After connecting the USB to CAN (PCAN) device to a PC, execute the command and the output result will be the name of the CAN interface.
ls /sys/class/net/ | grep -E 'can[0-9]+' | sort -V | tail -n 1

#Configuration
sudo ip link set can0 up type can bitrate 500000 sjw 4
Receive-Send test#
The device sends data and the PC receives it.
Device
#Execute command to send data.
sudo cansend can0 123#abcdabcd
PC
#Execute command to receive data.
sudo candump can0
#If the following message is printed, it indicates that the data has been successfully sent from the device side.
can0  123   [4]  AB CD AB CD
PC sends data and the device receives it.
PC
#Execute command to send data.
sudo cansend can0 123#abcdabcd
Device
#Execute command to receive data.
sudo candump can0
#If the following message is printed, it indicates that the data has been successfully sent from the PC side.
can0  123   [4]  AB CD AB CD
Troubleshooting Methods#
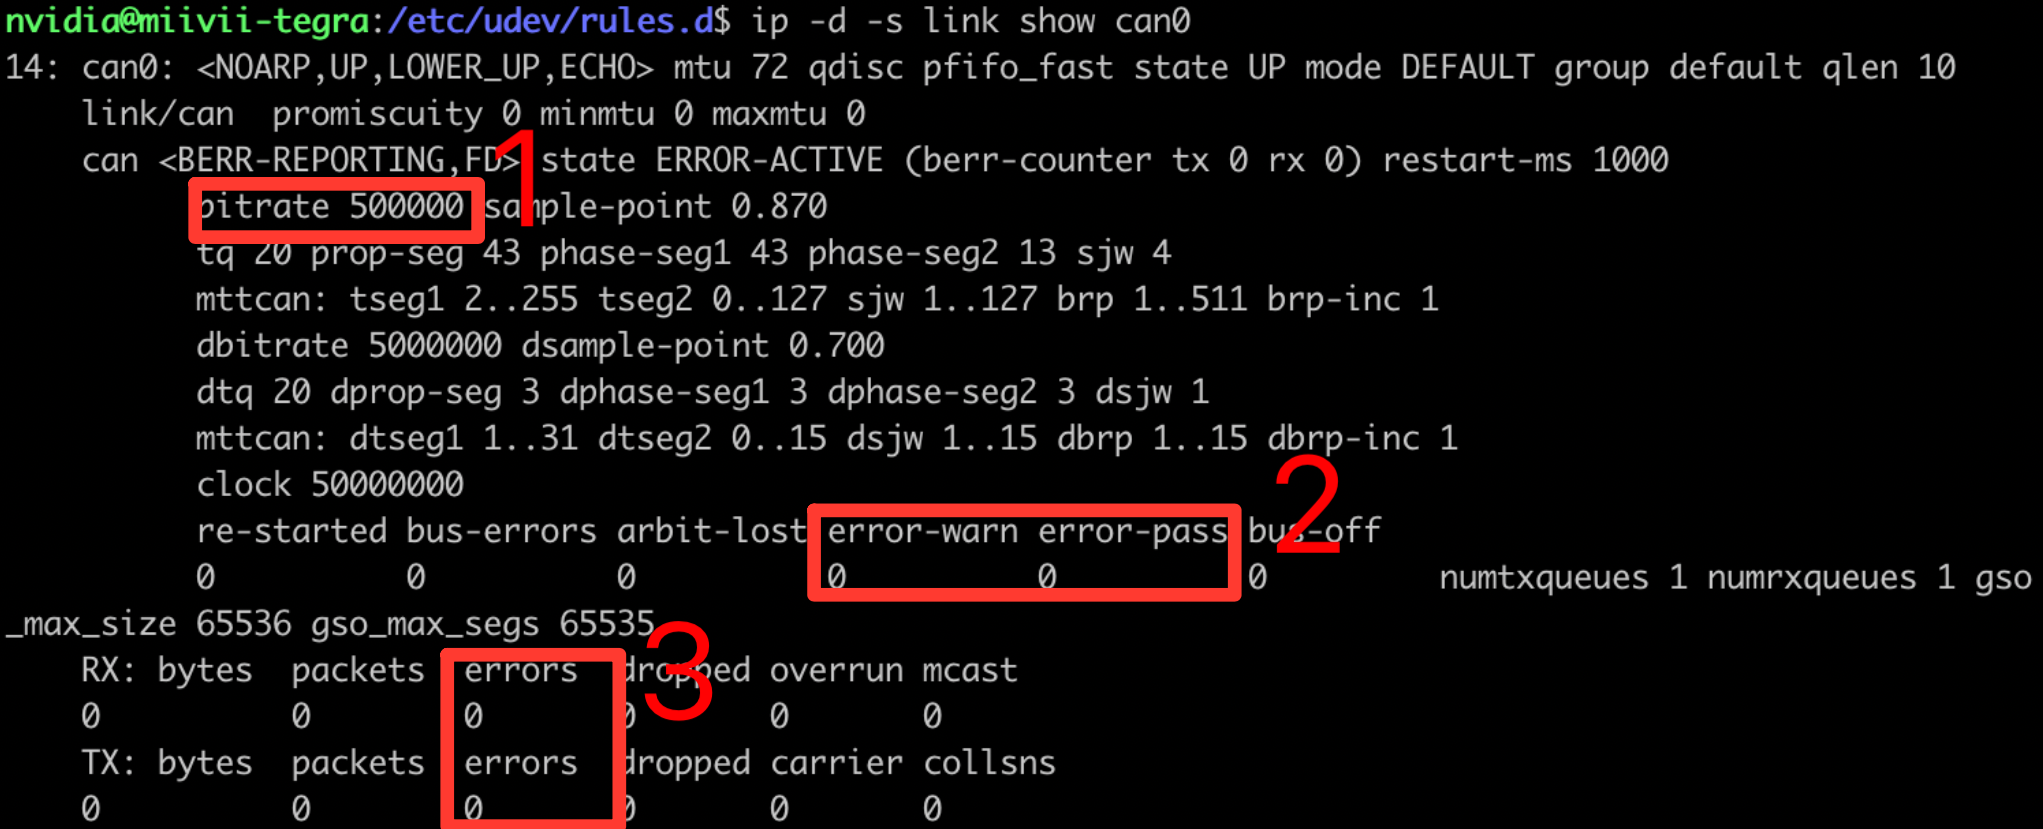
When you are unable to receive data, experiencing packet loss, or communication interruptions, you can use the following command to view the status information of can0.
ip -d -s link show can0
# Check if 1 is the same as the previously set value.
# Check if 2 and 3 are both 0.
# If 1, 2, and 3 are all fine, check the hardware connection.
# If there are issues and you cannot identify the problem, please contact technical support for further investigation.
Reference#
CAN problem troubleshooting#
Phenomenon 1: After the device is powered on, CAN cannot communicate.#
Check item 1: Check if the hardware environment is normal#
Step 1: Check if the interface is damaged#
If there is obvious damage to the interface, please directly refer it to Miwen’s after-sales service for handling.
If there is no damage, execute “Step 2: Cross-validation”.
Step 2: Cross-validation (if conditions permit)#
Connect the cable and the peripheral that sends CAN data to another device to check if communication can be normal.
If another device can communicate normally using the same configuration method, it is likely a hardware issue with that single device, and you need to contact Miwen’s after-sales service for handling.
If another device also fails to communicate properly, it is recommended to check whether there is a fault in the cable and the CAN peripheral.
If there is no other device for verification, you can use the CAN port of the device itself for short-circuiting and perform “Step 3: Short-circuit the interface to verify if the function is normal”.
Step 3: Short-circuit the interface to verify if the function is normal.#
Use DuPont wires to short-circuit the faulty CAN port with other CAN ports, and use cansend and candump for sending and receiving verification.
For details on the CAN pin definition and transceiver verification method, please refer to:https://doc.miivii.com/Apex-AD10-User-Manual-CH/wiki/Apex-AD10-CAN.html。
If the two CAN ports can communicate normally, it is recommended to check whether there is a fault in the cable and the CAN peripheral.
If the two CAN ports cannot communicate normally, execute “Check Item 2: Check whether CAN is configured correctly”.
Check item 2: Check if can is configured correctly#
Step 1: Use ifconfig -a to check the interface status#
Open the terminal and enter the command:
ifconfig -a
If the faulty can cannot be identified, execute “Step 2: Check whether can has been initialized and configured (NV mttcan is not loaded by default)”.• If the faulty can node can be identified, execute “Step 3: Configure can parameters”.
Step 2: Check whether can has been initialized and configured (NV mttcan is not loaded by default)#
Newly loaded can node:
sudo modprobe can
sudo modprobe can_raw
sudo modprobe mttcan
After reconfiguring the CAN node, use ifconfig -a to verify whether the CAN node can be identified.
If the CAN node can be identified, execute “Step 3”.
If the CAN node cannot be identified, it is most likely a problem with a single piece of hardware, and you need to contact Miwen’s after-sales service for handling.
Step 3: Configure CAN parameters#
sudo ip link set can2 up type can bitrate 500000 dbitrate 5000000 restart-ms 1000 berr-reporting on fd on
This parameter configures the baud rate of the CAN interface. Among them, 500K is the rate used when transmitting with the CAN 2.0 protocol, and 5M is the rate used when transmitting with the CAN FD protocol.
Note: The baud rate of the CAN interface must be consistent with the baud rate of the peripheral that sends CAN data.
If after reconfiguration, the can can communicate normally, the problem is resolved.
If after reconfiguration, the can still cannot communicate normally, execute “Check Item 3: Re-flash the image to verify if it is caused by the software environment”.
Check item 3: Re-flash the image to verify if it is caused by the software environment#
Step 1: Flash the image#
For details on the method of flashing the image, please refer to:https://doc.miivii.com/Apex-AD10-User-Manual-CH/wiki/Apex-AD10-%E5%9B%BA%E4%BB%B6%E7%83%A7%E5%86%99.html。
After the image flashing is completed, reconfigure the CAN node to perform CAN communication verification.
After flashing the image, if the CAN can communicate normally, it indicates that the issue is caused by the system software environment, and the customer needs to check the software environment themselves.
After flashing the image, if communication is still not possible, connect the device to the external network and then execute “Step 2: Obtain the log”.
Step 2: Obtain the log#
Then, after connecting the device to the external network, open the terminal and enter:
curl -sSL https://doc.miivii.com/scripts/run_miivii_diagnostic.sh | bash -s can
And export the logs, then upload them to the fault work order system (the analysis is performed by Miwen’s after-sales engineers).
Phenomenon 2: The CAN port communication gets blocked after a period of time#
Check item 1: Inspect the external environment#
Step 1: Confirm whether the nodes of the on-site CAN bus have been subjected to common ground processing.#
If common grounding has not been done, please perform common grounding.
If common grounding has already been done, please execute “Check Item 2: Check the can txqueuelen configuration”.
Check item 2: Check the can txqueuelen configuration#
Step 1: Check the size of txqueuelen#
Open the terminal and enter:
sudo ip link show can0 | grep txqueuelen
Step 2: Set the maximum txqueuele to 65536#
Open the terminal and enter:
sudo ip link set can0 txqueuelen 6553
If the CAN communication is normal after the settings are completed, users can adjust it to a suitable value according to actual needs.
If the CAN communication is still blocked after the settings are completed, connect the device to the external network when the problem recurs, open the terminal and enter:curl -sSL https://doc.miivii.com/scripts/run_miivii_diagnostic.sh | bash -s can
Export the logs and upload them to the fault work order system (the analysis is performed by Miwen after-sales engineers).