BRD602 ORIN Firmware Flash#
#
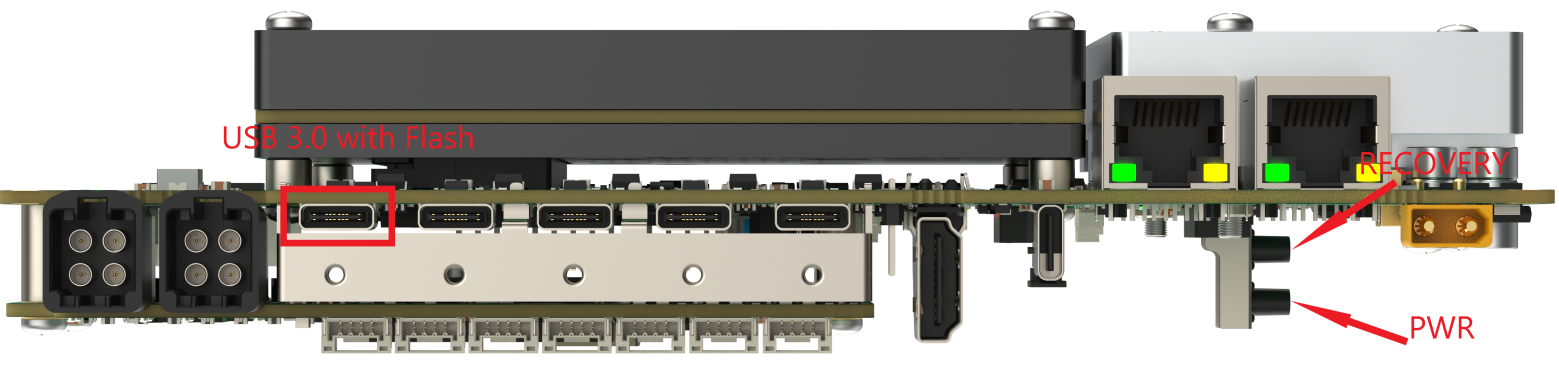
Operation Instructions for Entering the Programming Mode#
Hold down the Recovery KEY while powering off/on the device.
Use a USB type-c cable to connect the PC and the device’s programming port.
On the PC side for burning, confirm that the device has entered the recovery mode.
#Use command
lsusb
#If the device is in recovery state
Bus 001 Device 011: ID 0955:7023 NVidia Corp
Function Introduction:#
The Miivii Flashing Tool is applicable to Miivii series products. This tool is a software provided to facilitate the flashing, cloning, and small - batch
production of Miivii devices. Its core functions include:
Automatically detect the usage environment
Automatically detect the latest image
Built - in image downloader, no need to manually download the image
Support batch flashing
Support image cloning (note that after cloning, flashing requires the use of the same bootloader version)
Preparatory Work#
Hardware Preparation#
Flashing Host#
Hardware Requirements: The flashing host needs to be connected to the Miivii device to flash the image. The recommended configuration of the flashing host is as follows:
CPU: Intel Core series processor, 4 cores, main frequency of 1.7GHz or higher
Memory: 8GB or higher
System Requirements:
The file system is EXT4
Free hard disk capacity of 40G or more
The system is Ubuntu x64 LTS 20.04 or LTS 22.04
Miivii device and power supply, USB data cable (with data transfer function)
Software Preparation:#
Download and install the miivii - ftool software in the host.
|
Start flashing the device.#
Confirm that the device has entered the flashing mode.#
(Refer to the illustrated operation introduction at the beginning of the document.)
Open the flashing software#
In the Ubuntu system, you can click “Activities” in the lower left corner of the screen to display your software page. You can search for miivii-ftool in the search bar at the top, and you will find the following software.
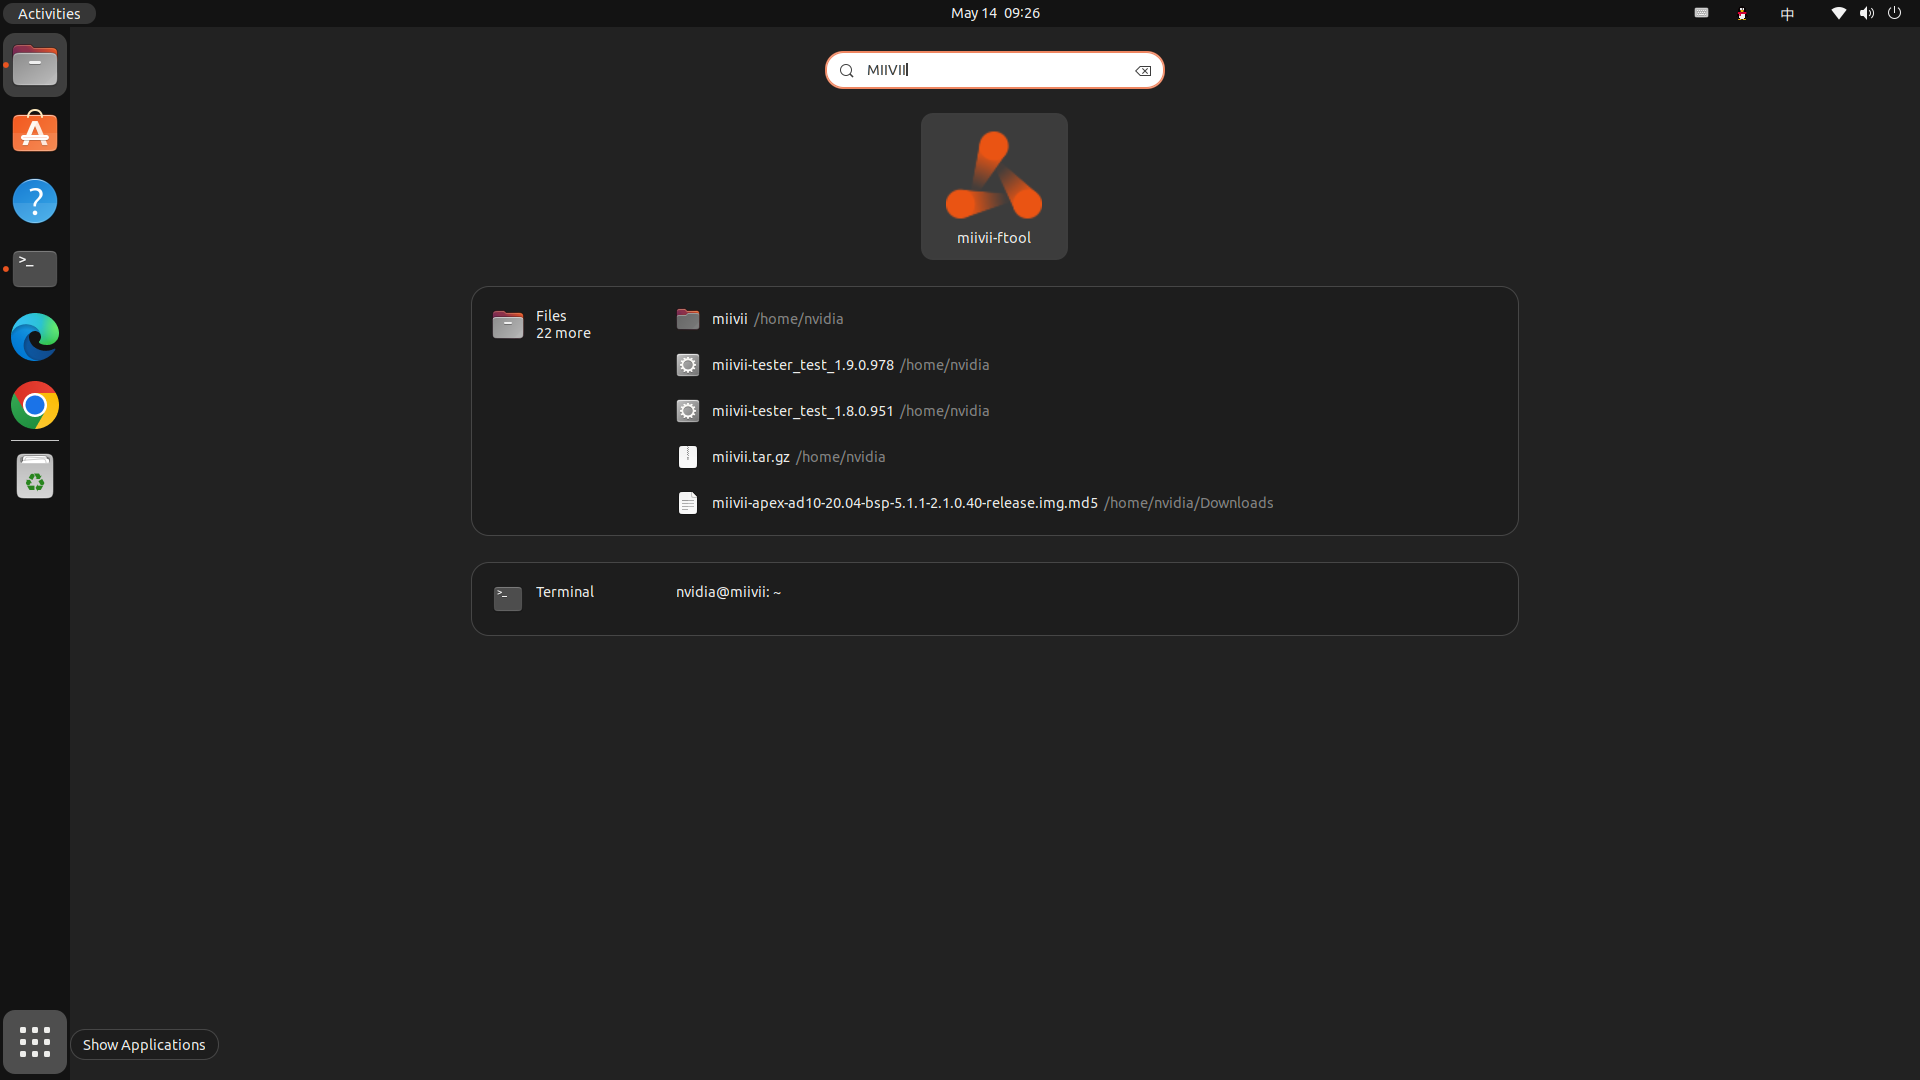
You can also enter “gtk-launch miivii-ftool” in the terminal (Ctrl+Alt+T) to open it quickly.
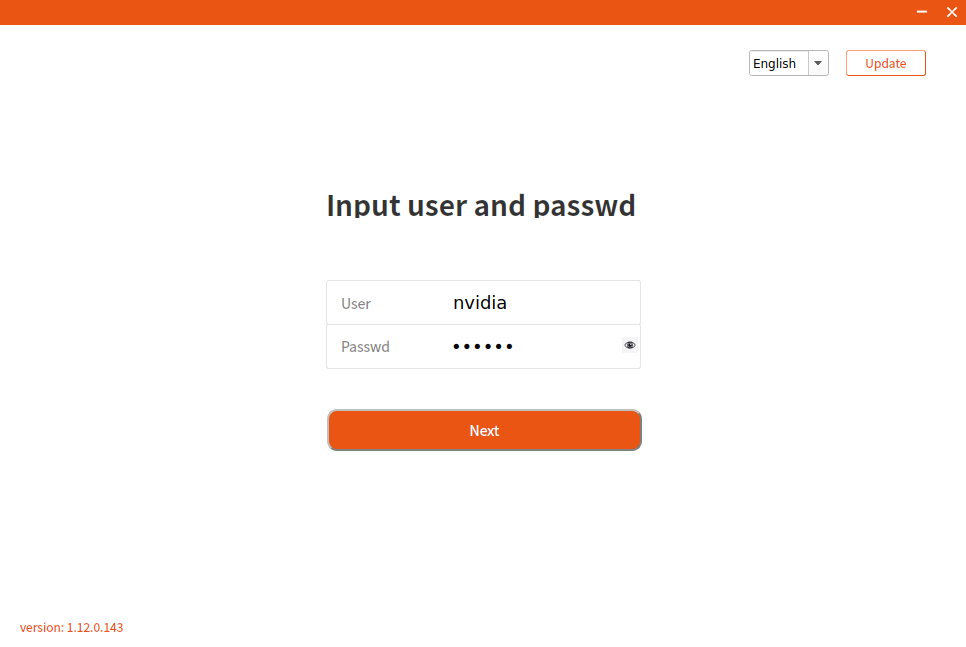
Click to open the software and enter the password: your sudo password (PC host startup password).
If you have downloaded the flashing tool before and have not updated it for a while, please click “Update” in the upper right corner to update to the latest version so that you can flash the latest Mivins mirror.
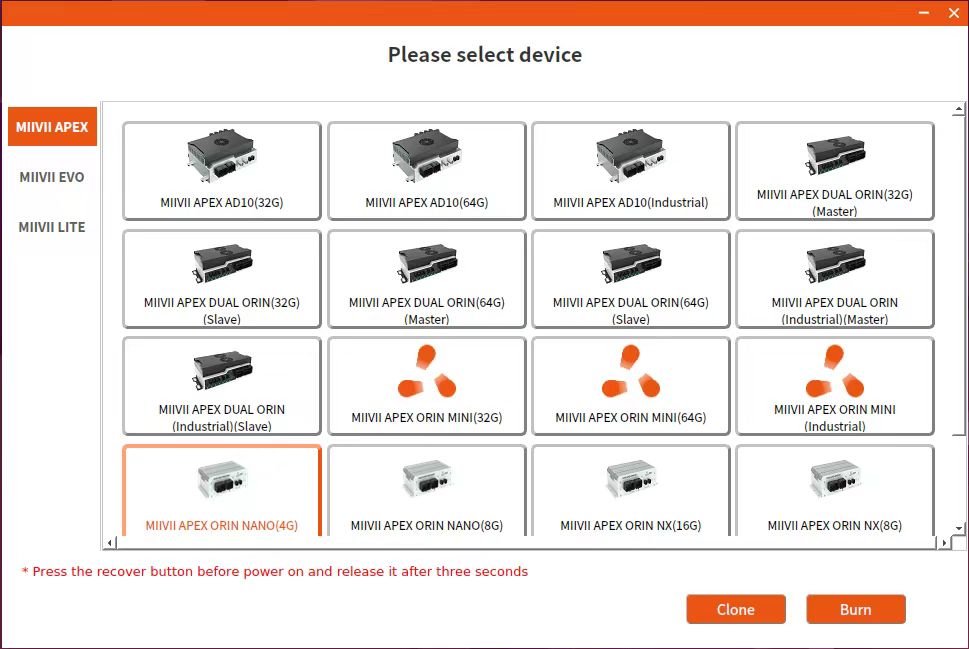
Display the device selection interface as shown. Select your device (note the distinction between different memory versions).
Online mode mirror burning (recommended. Offline burning can also be carried out if necessary)#
Click the “Online Mode” checkbox, select the Jetpack version and download path (in online mode, the image will be downloaded to the local before burning the image to the device), and click Next to start downloading the latest flashing environment and device image of the selected version.
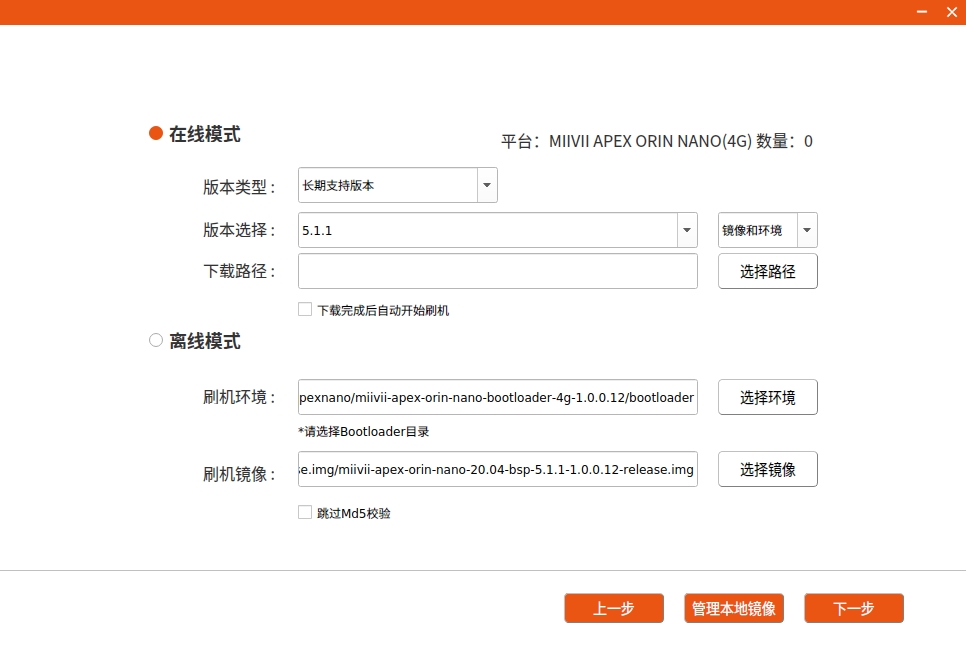
Here you need to choose whether to automatically start flashing the device after the download is complete. If you choose “Automatic”, after the download is complete, the system will automatically unzip, verify, and flash the device. The download speed depends on the network speed of your environment, and it can generally reach 5M/s.
(Since the image package is relatively large, the online mode includes the process of downloading the compressed package.
It takes about 30 minutes to download at an average network speed.)
And it usually takes more than 15 minutes to complete the flashing process after starting.
Please be patient. If the flashing is successful, the following page will appear:
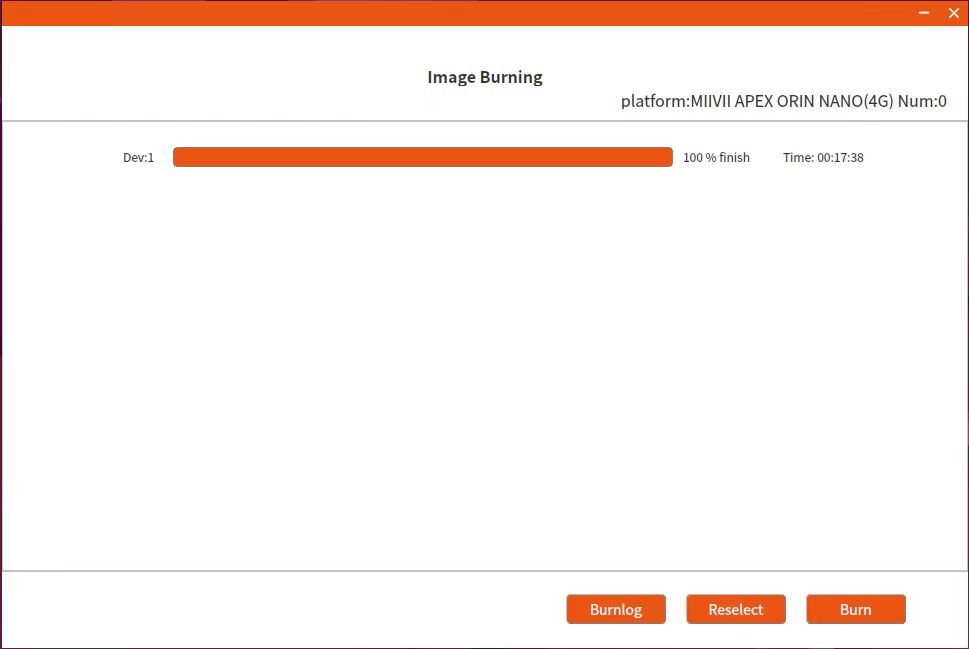
Problem Troubleshooting If you encounter burning issues, please perform self-checks according to the following items first:
Check if the host computer startup password has been entered in the burning tool.
Check if you have entered the Recovery mode (green light on constantly + yellow light flashing slowly), which can be identified by the lsusb command.
Check if the quality of the USB cable meets the standard and whether it is just a two-core cable for charging only.
Check if the USB interface of the burning host computer still has the data transfer function (this generally occurs in old host computers).
Check the host computer to see if it is an X86-64 architecture desktop computer or laptop. (Other devices such as servers, embedded devices, and virtual machines are not supported for now.)
Check if the host computer system is Ubuntu x64 v20.04 or v22.04.
Check the disk format. The recommended disk format for the burning host computer is EXT4.
Check if the capacity of the host computer is sufficient.
There should be no Chinese characters or other special characters in the storage paths of the image and the burning tool.
Troubleshooting of Firmware Flashing Issues#
Phenomenon 1: The hardware connection is normal, but the burning tool cannot recognize the device.#
Check item 1: Confirm whether it has entered recovery mode#
Step 1: Use lsusb to confirm whether the device has “nvidia corp + product series”#
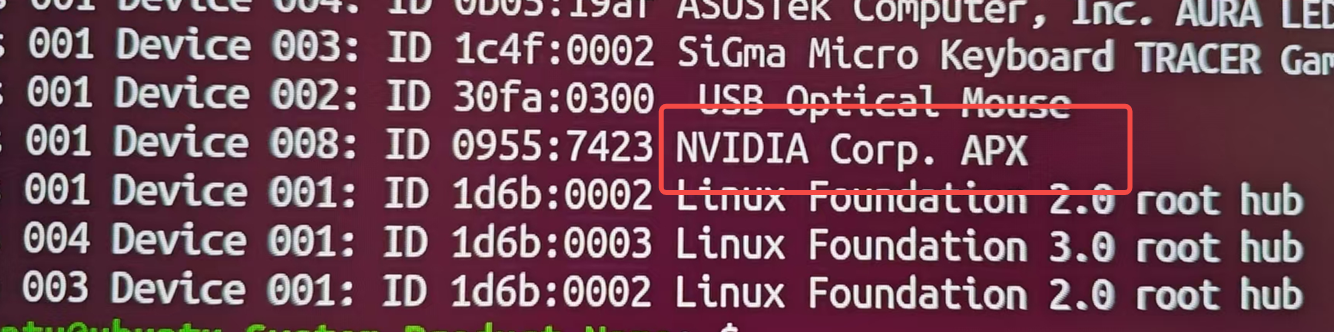
The words “nvidia corp” indicate that the device has entered recovery mode. Execute “Troubleshooting Item 3: Confirm whether the USBID corresponds to the USBID of the selected product”.
If not, power off the device, then long-press the “recovery” button to try to enter recovery mode. If it still fails to enter recovery mode, execute “Troubleshooting Item 2: Confirm whether the wiring is correct”.
Check item 2: Confirm whether the wiring is correct#
Step 1: Connect the device end to the “flash port”#

Step 2: Confirm whether the programming cable is working properly#
Check if the Micro USB and dual Type A cables have data transmission functions, meet quality standards, and are not just two-core cables used for charging. If unsure, replace the cable harness for cross-validation.
Step 3: Check if the burning PC is directly connected to the device#
Do not use a hub for转接 (adapter).
Check item 3: Confirm whether the USBID corresponds to the USBID of the selected product#
Steps:
Check if the corresponding product has a USBID in /home/$USER/.cache/miivii-ftool/lremote.json.
Use lsusb | grep -i “nvidia corp” to view the output and check if it is the USBID of the corresponding product.
Check whether the USBIDs from “1” and “2” can match. If they do not match, check if the model of the upper computer product is inconsistent with the actual device.
Check item 4: Confirm whether the configuration of the programming PC is correct#
Step 1: Check if the hardware configuration is correct#
Check if the upper computer system is Ubuntu x64 v16.04, v18.04, or v20.04.
Check the disk format; the recommended disk format for the burning host is EXT4.
Phenomenon 2: After the user selects the flashing environment and image and clicks “Next”, a prompt appears: “There is a problem with the flashing environment, please check.”#
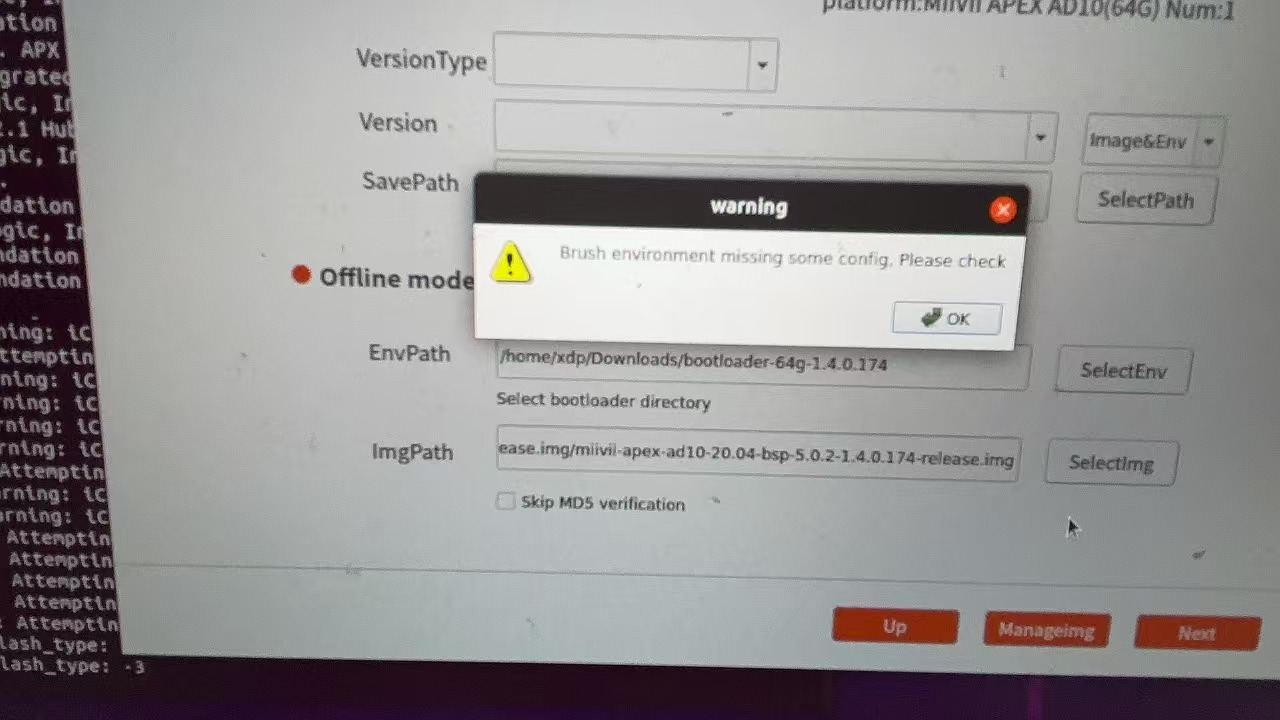
Check item: Check whether the user group of the selected directory is the user who starts the program.#
Step 1: Restart the flashing tool and confirm that the username entered on the login interface is the user who launched the current program.Step 2: Check whether there are special characters (such as Chinese characters, spaces, etc.) in the full path of the selected directory. If there are, delete the special characters and reselect the path.#
Phenomenon 3: After selecting the mirror and bootloader to start burning, an error is reported in the burning log.#
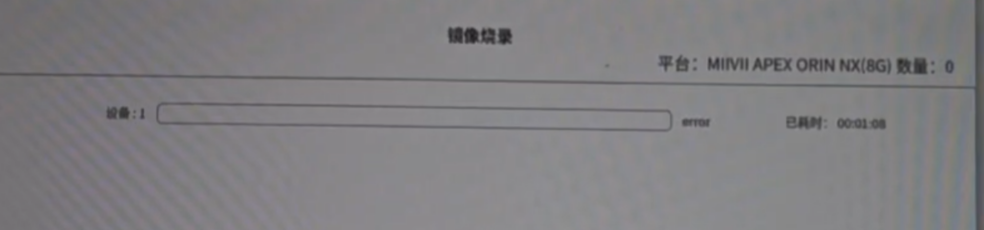
It is recommended that in offline mode, focus on checking the selected device and its corresponding bootloader. Pay special attention to ensuring that the bootloader corresponds to the device memory and matches the image version.#
Check item 1: Open the log information to view the error content#
Step 1: Find the flashing log file and check the error information (File location: in the path where the image is stored)#
Step 2: Check the burning log
log error: Return Value 8
Check the log to see if the burning of system.img has started.
If the burning in step 1 has not started, confirm whether the versions of the bootloader and the img file correspond.
Confirm whether the size of the image file is correct and verify the md5 value.
Perform the burning again.
If the above steps cannot solve the problem, replace the burner and then perform the image burning operation.
log error: Return Value
Confirm whether the mirror version is correct, whether the mirror is complete, and whether the bootloader is consistent with the device’s own memory.
Replace the wiring harness and USB port for re-flashing.
If steps 1 and 2 fail to solve the problem, replace the burner and then perform the mirror flashing operation.
If all the above troubleshooting items are correct, the problem can be solved. If the problem still cannot be solved, the device needs to be sent back to Miwen for hardware inspection.
Phenomenon 4: The log shows No Module Named#
Check item: Check if the python environment is normal#
Step 1: Check if there is python3 (python3 –version)#
Step 2: Reinstall Python to solve the problem#