BRD601 THOR SSD Usage#
SSD installation:#
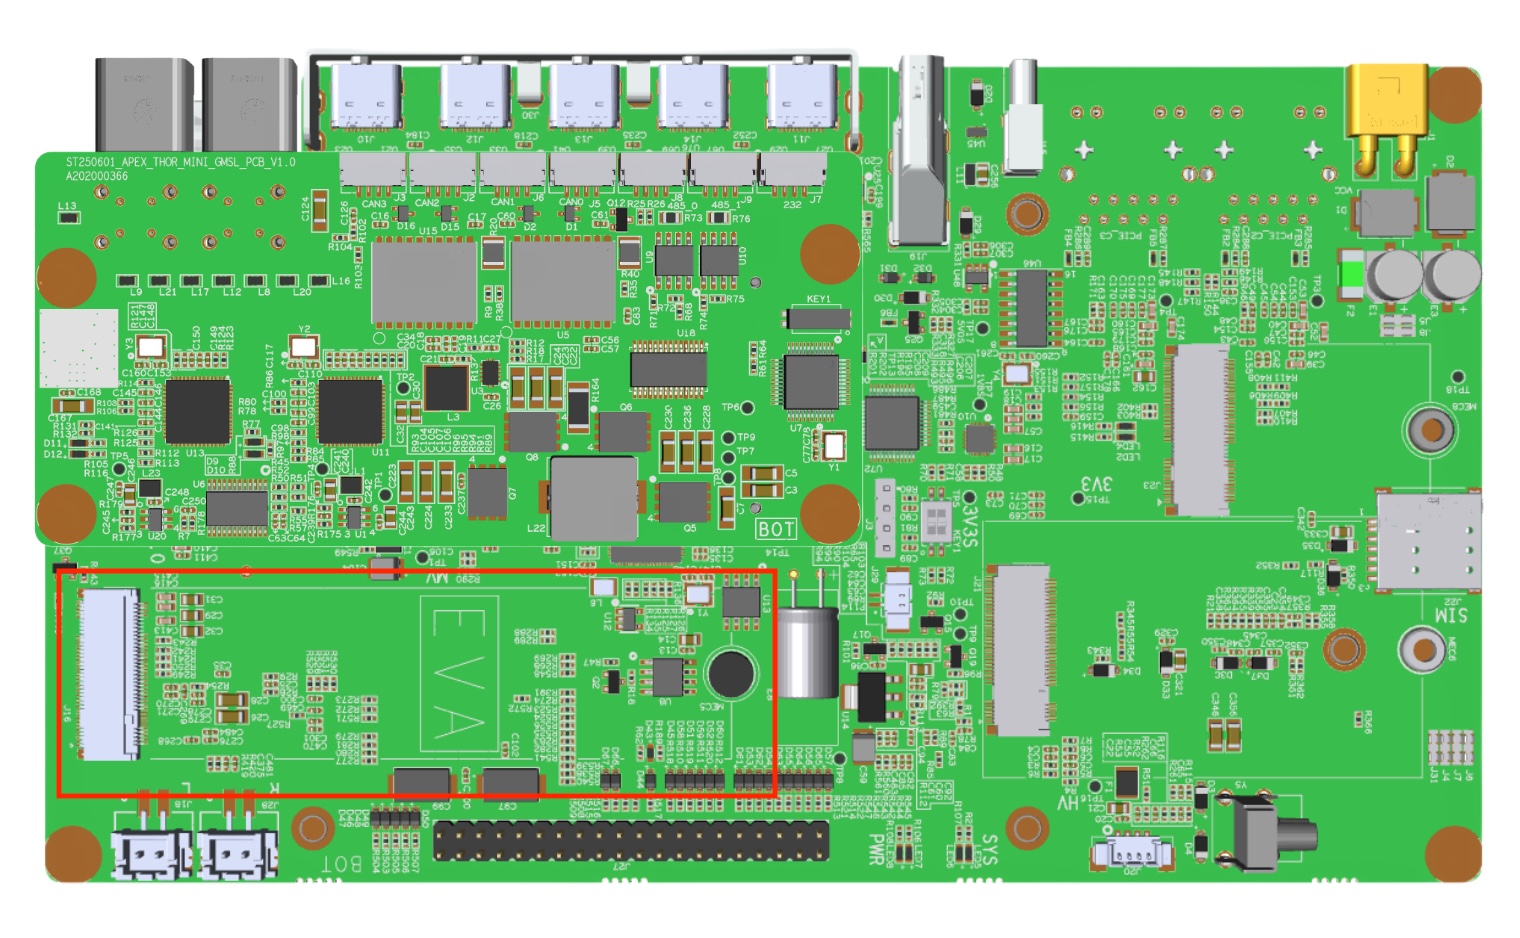
Required accessories:#
SSDx1
M3*6 cross-headed screw with adhesive x1
2.5mm thermal pad x1
special EVA cotton x1
Precautions:#
An SSD needs to be installed with a thermal pad for heat dissipation treatment.
#
M. 2 SSD hard disk#
Check ssd information:
sudo fdisk -lu
Figure screenshot of viewing hard disk information page
Format hard disk:
sudo mkfs -t ext4 /dev/nvme0n1
Figure screenshot of formatted hard disk
View hard disk UUID:
sudo blkid /dev/nvme0n1
Figure screenshot of hard disk UUID
Setting method of automatic mounting SSD:** Create a systemd service in the /etc/systemd/system path to automatically mount the **SSD when booting, such as: miivii_mount_ssd.service
#创建服务miivii_mount_ssd.service
vim miivii_mount_ssd.service
[Unit]
Description=MIIVII specific script
After=udev.service

[Service]
ExecStart=/etc/systemd/miivii_mount_ssd.sh

[Install]
WantedBy=multi-user.target
Create a script under the path of / etc / SYSTEMd / to mount the hard disk, such as miivii_ mount_ ssd. sh
#创建服务脚本miivii_mount_ssd.sh
vim miivii_mount_ssd.sh
#!/bin/bash
mount -o rw /dev/nvme0n1 /home/nvidia/workspace
change mode for this script
sudo chmod +x miivii_mount_ssd.sh
Set the mounted SSD service to start at boot
sudo systemctl enable miivii_mount_ssd.service
SSD problem troubleshooting#
Phenomenon 1: The SSD cannot be automatically mounted after the device is started.#
Solution:#
1、Check the physical connection:
1)Confirm that the SSD is fully inserted into the device’s M.2 slot or external interface (such as USB/SATA).。
2)Tip: If it is an external SSD, check whether the interface is oxidized or loose.。
2、Verify the basic functions of SSD
1)Remove the SSD, install it in a hard drive enclosure, and then connect it to other devices (such as a computer).:
2)Other devices can recognize → Reformat to ext4 file system (back up data before operation);
3)If other devices cannot recognize it → The SSD hardware is damaged and needs to be replaced.
3、Check the system identification status
1)Open the terminal and enter the command to check if the SSD is recognized:
 #Display all storage devices
lsblk
2)The SSD is not displayed → It may be due to an unloaded driver or a hardware failure;
3)The SSD is displayed but not mounted → Proceed to the next troubleshooting step.
4、Check partitions and file systems
1)Enter the command to view partition information:
# Display disk partitions
sudo fdisk -l
2)If there is an abnormality in the partition table or an error in the file system type (such as NTFS), reformatting is required:
# Replace with the actual partition name(如sda1)
sudo mkfs -t ext4 /dev/sdXn
5、Try to mount manually
1)Create a mount directory and mount it manually:
sudo mkdir /mnt/ssd
sudo mount /dev/sdXn /mnt/ssd
2)Mounting successful → The automatic mount configuration needs to be fixed (check the /etc/fstab file);
3)Mounting failed → Collect logs and submit for analysis (see “Technical Support Guidelines”).
Phenomenon 2: The SSD is mounted but cannot be read or written.#
Solution:#
1、Check mount point permissions
1)Enter commands to view the permissions of the mounted directory:
# Check permissions and owners
ls -ld /mnt/ssd
2)If the permissions are insufficient, modify them to read - write permissions:
 # Open read and write permissions
sudo chmod 755 /mnt/ssd
 # Adjust the owner
sudo chown 用户名:用户组 /mnt/ssd
2、Verify the file system type
1)Enter the command to confirm the file system type:
# View the type (such as ext4, NTFS)
sudo blkid /dev/sdXn
2)If the type is incompatible (such as NTFS), you need to back up the data and then reformat it to ext4.
3、Check the health status of the file system
1)Run the repair command after unmounting the partition:
sudo umount /dev/sdXn
 # Automatically repair errors
sudo fsck -y /dev/sdXn
2)Repair failed → There may be physical bad blocks on the SSD. It is recommended to replace it.
4、Test reading and writing ability
1)Create a test file to verify the functionality:
# Write to the test file echo "test" > /mnt/ssd/test.txt
# Read the test file
cat /mnt/ssd/test.txt
2)Write/Read failure → Check the SSD lifespan (using the smartctl tool) or replace the hard drive.
Technical Support Guidelines#
Requirements for Submitting Information:
1)SSD model and interface type (such as M.2 NVMe/SATA);
2)Screenshots of terminal command outputs (such as the results of lsblk and fsck);
3)Log file ( bygenerated the following command):
curl -sSL https://doc.miivii.com/scripts/run_miivii_diagnostic.sh | bash -s ssd