APEX OIRN MINI GMSL External Camera Trigger#
Camera working mode selection#
Work mode |
Pattern description |
Differences in usage |
Attention |
|---|---|---|---|
Use external trigger |
The start time of exposure will be controlled by the device, and all cameras will shoot simultaneously. |
You can use the default Linux method and the SDK to obtain images. |
All cameras need to use the same working mode. |
Function and role:#
Eliminate the time difference between cameras: In the traditional continuous shooting mode, each camera works independently, and there are slight differences in the time points of exposure and image acquisition. For scenarios such as high-speed moving object analysis, multi-view 3D reconstruction, and precision industrial inspection, this time difference can lead to data misalignment or inconsistency, affecting the accuracy of the results. The external trigger function enables all cameras to strictly follow the command of the same external signal, achieving simultaneous shooting.
Unified frame rate control: Through the configuration interface, the system will automatically list all the frequencies commonly supported by all connected cameras for selection, and an accurate trigger frequency can be uniformly set for all cameras that support external triggering.
Key advantages:#
High-precision synchronization: All cameras start exposure the moment they receive an external trigger signal, achieving microsecond-level or even higher-precision synchronization.
Consistent and controllable frame rate: Uniformly set and verify the shooting frequency of all cameras to ensure the consistency of data acquisition rhythm.
Simplified configuration: The external trigger mode can be enabled and the commonly supported frequency can be selected through an intuitive software interface, without the need for complex underlying commands.
Flexible compatibility: Supports obtaining the synchronized image stream through the standard Linux method or using our SDK.
Application scenarios:#
Autonomous Driving/Robot Vision: Multiple cameras synchronously capture environmental information to ensure the spatio-temporal consistency of perception data.
Industrial Automation and Machine Vision: Multi-station synchronous measurement and positioning of high-speed moving objects on the production line, robot guidance and grasping.
Sports Science Analysis: Multiple cameras capture the movements of athletes for accurate motion trajectory and pose reconstruction.
VR/AR: Build spatial perception or synchronously record the real environment with multiple cameras.
Scientific Research Experiments: Experiments that require multiple sensors to collect data at strictly the same time point.
Usage method#
After selecting the corresponding camera, if the camera supports external triggering, the “Use external trigger mode” option will be available.
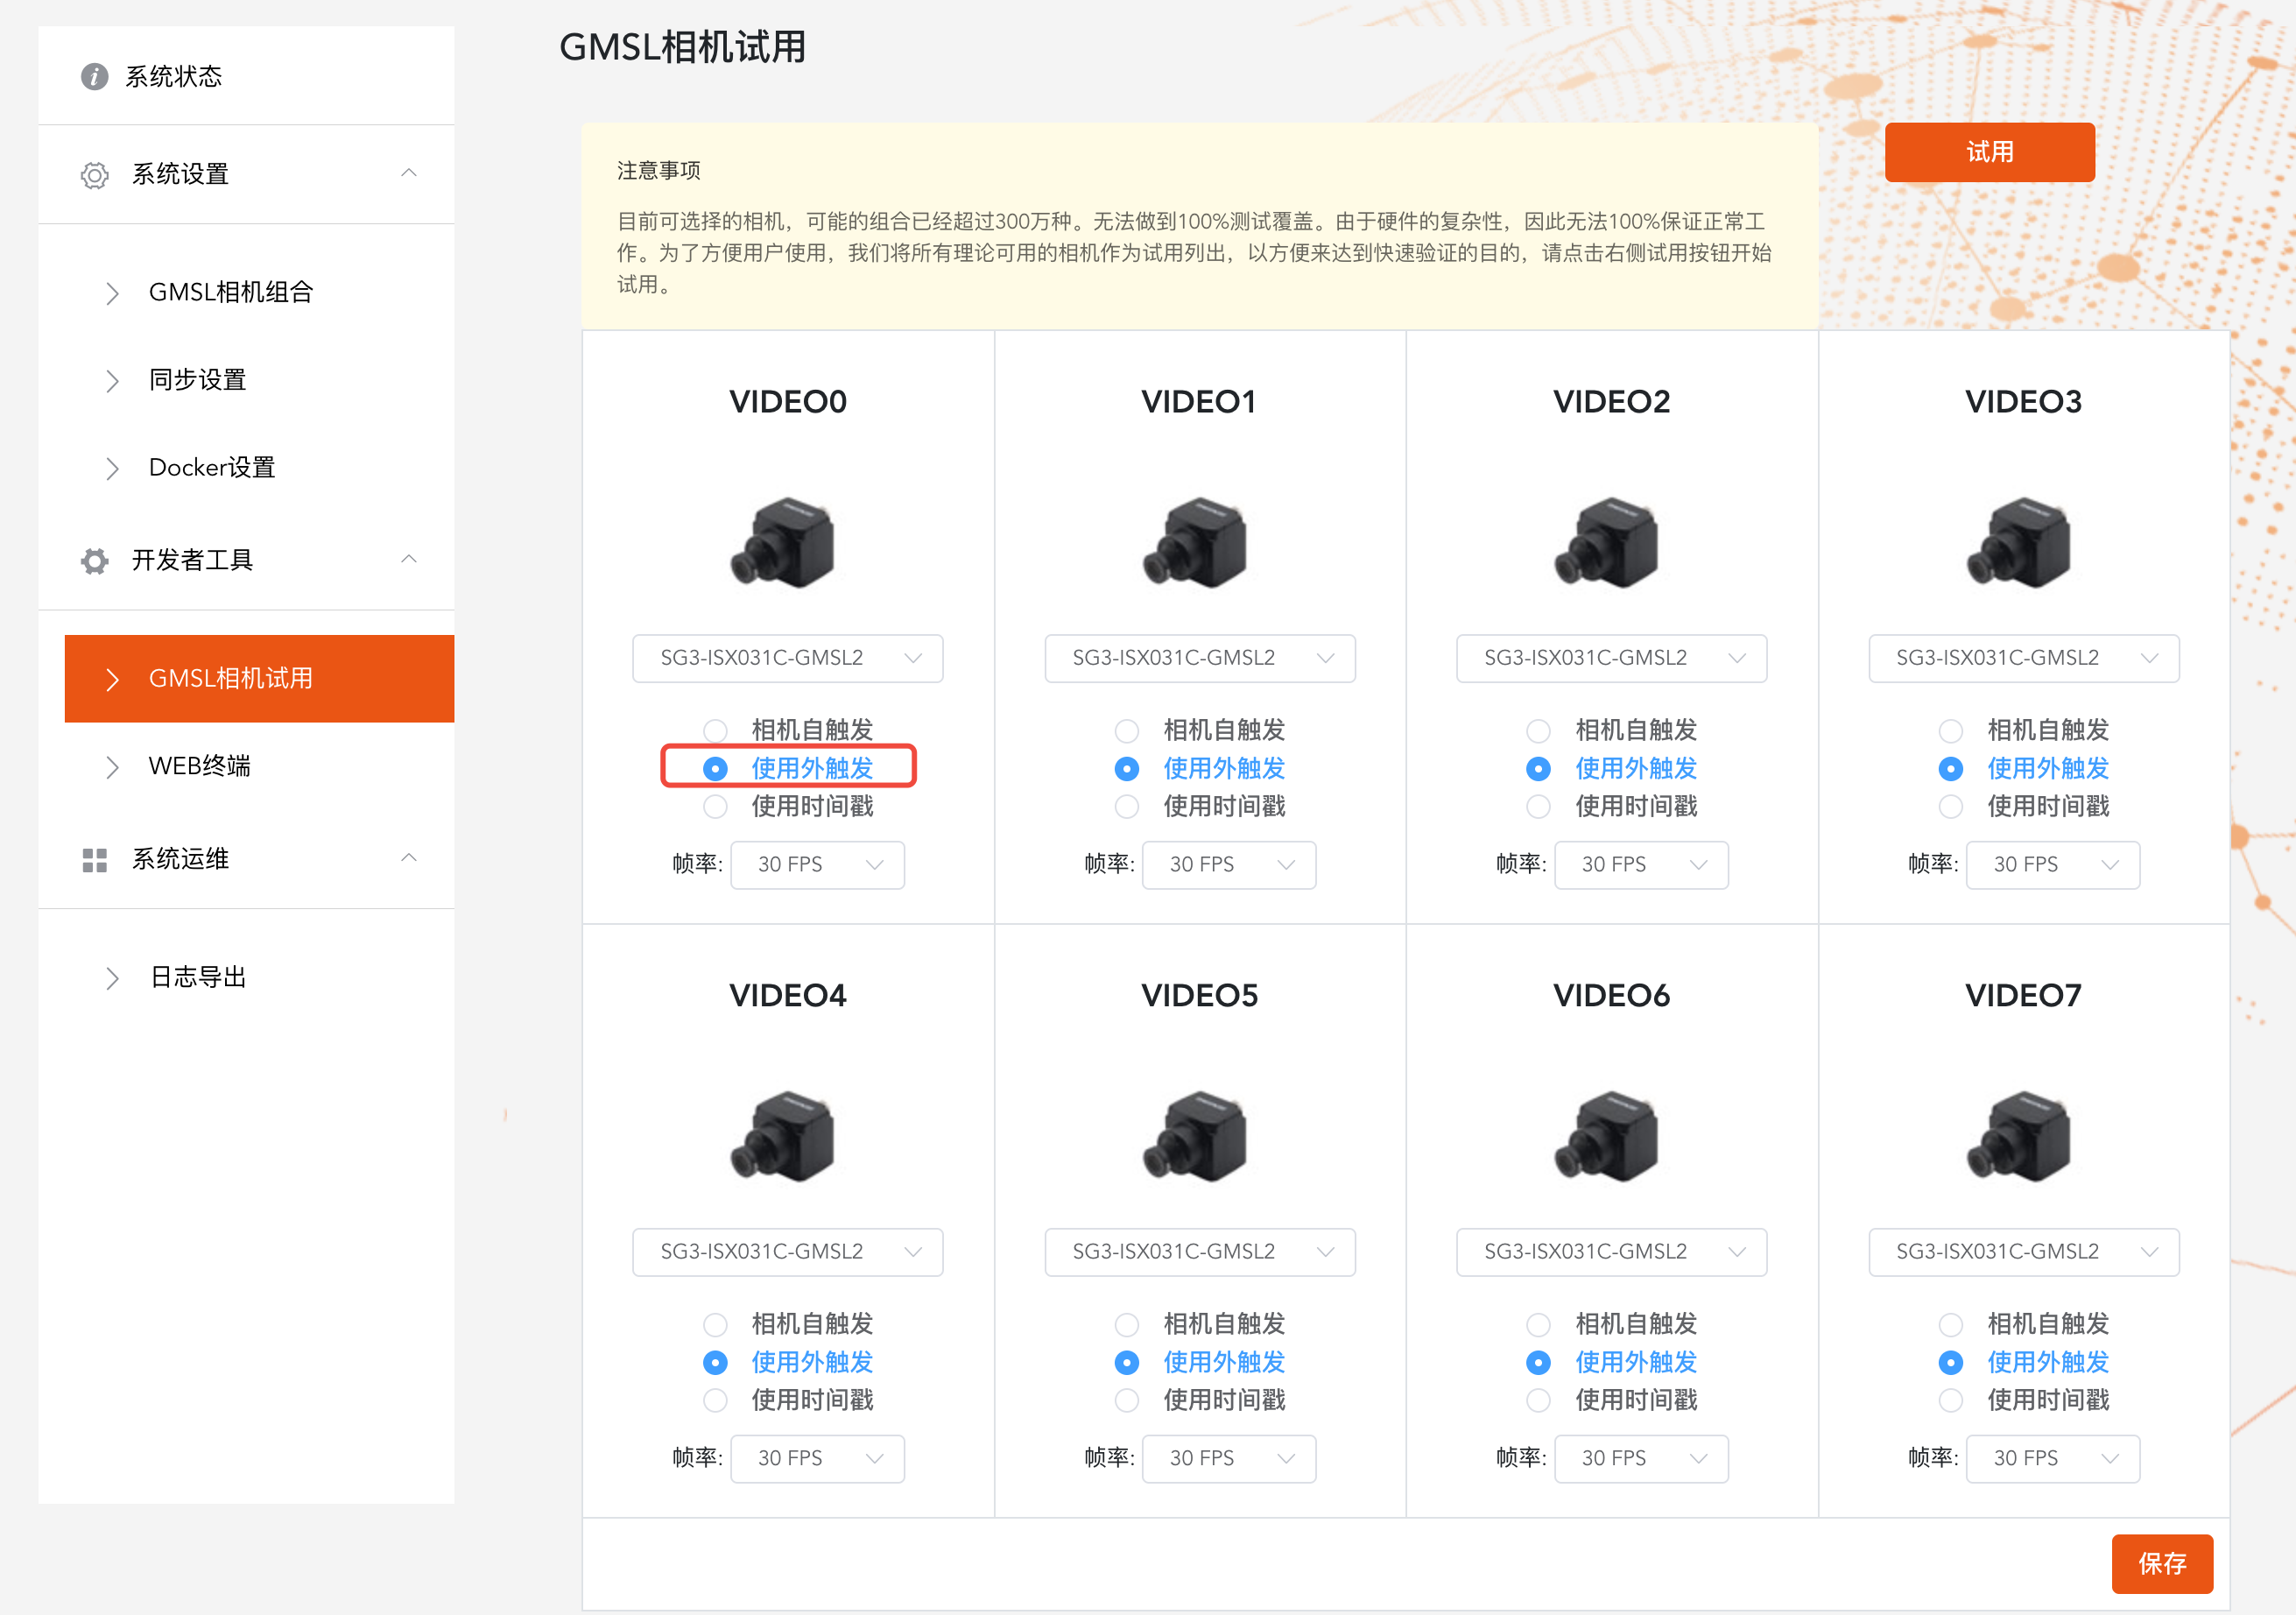
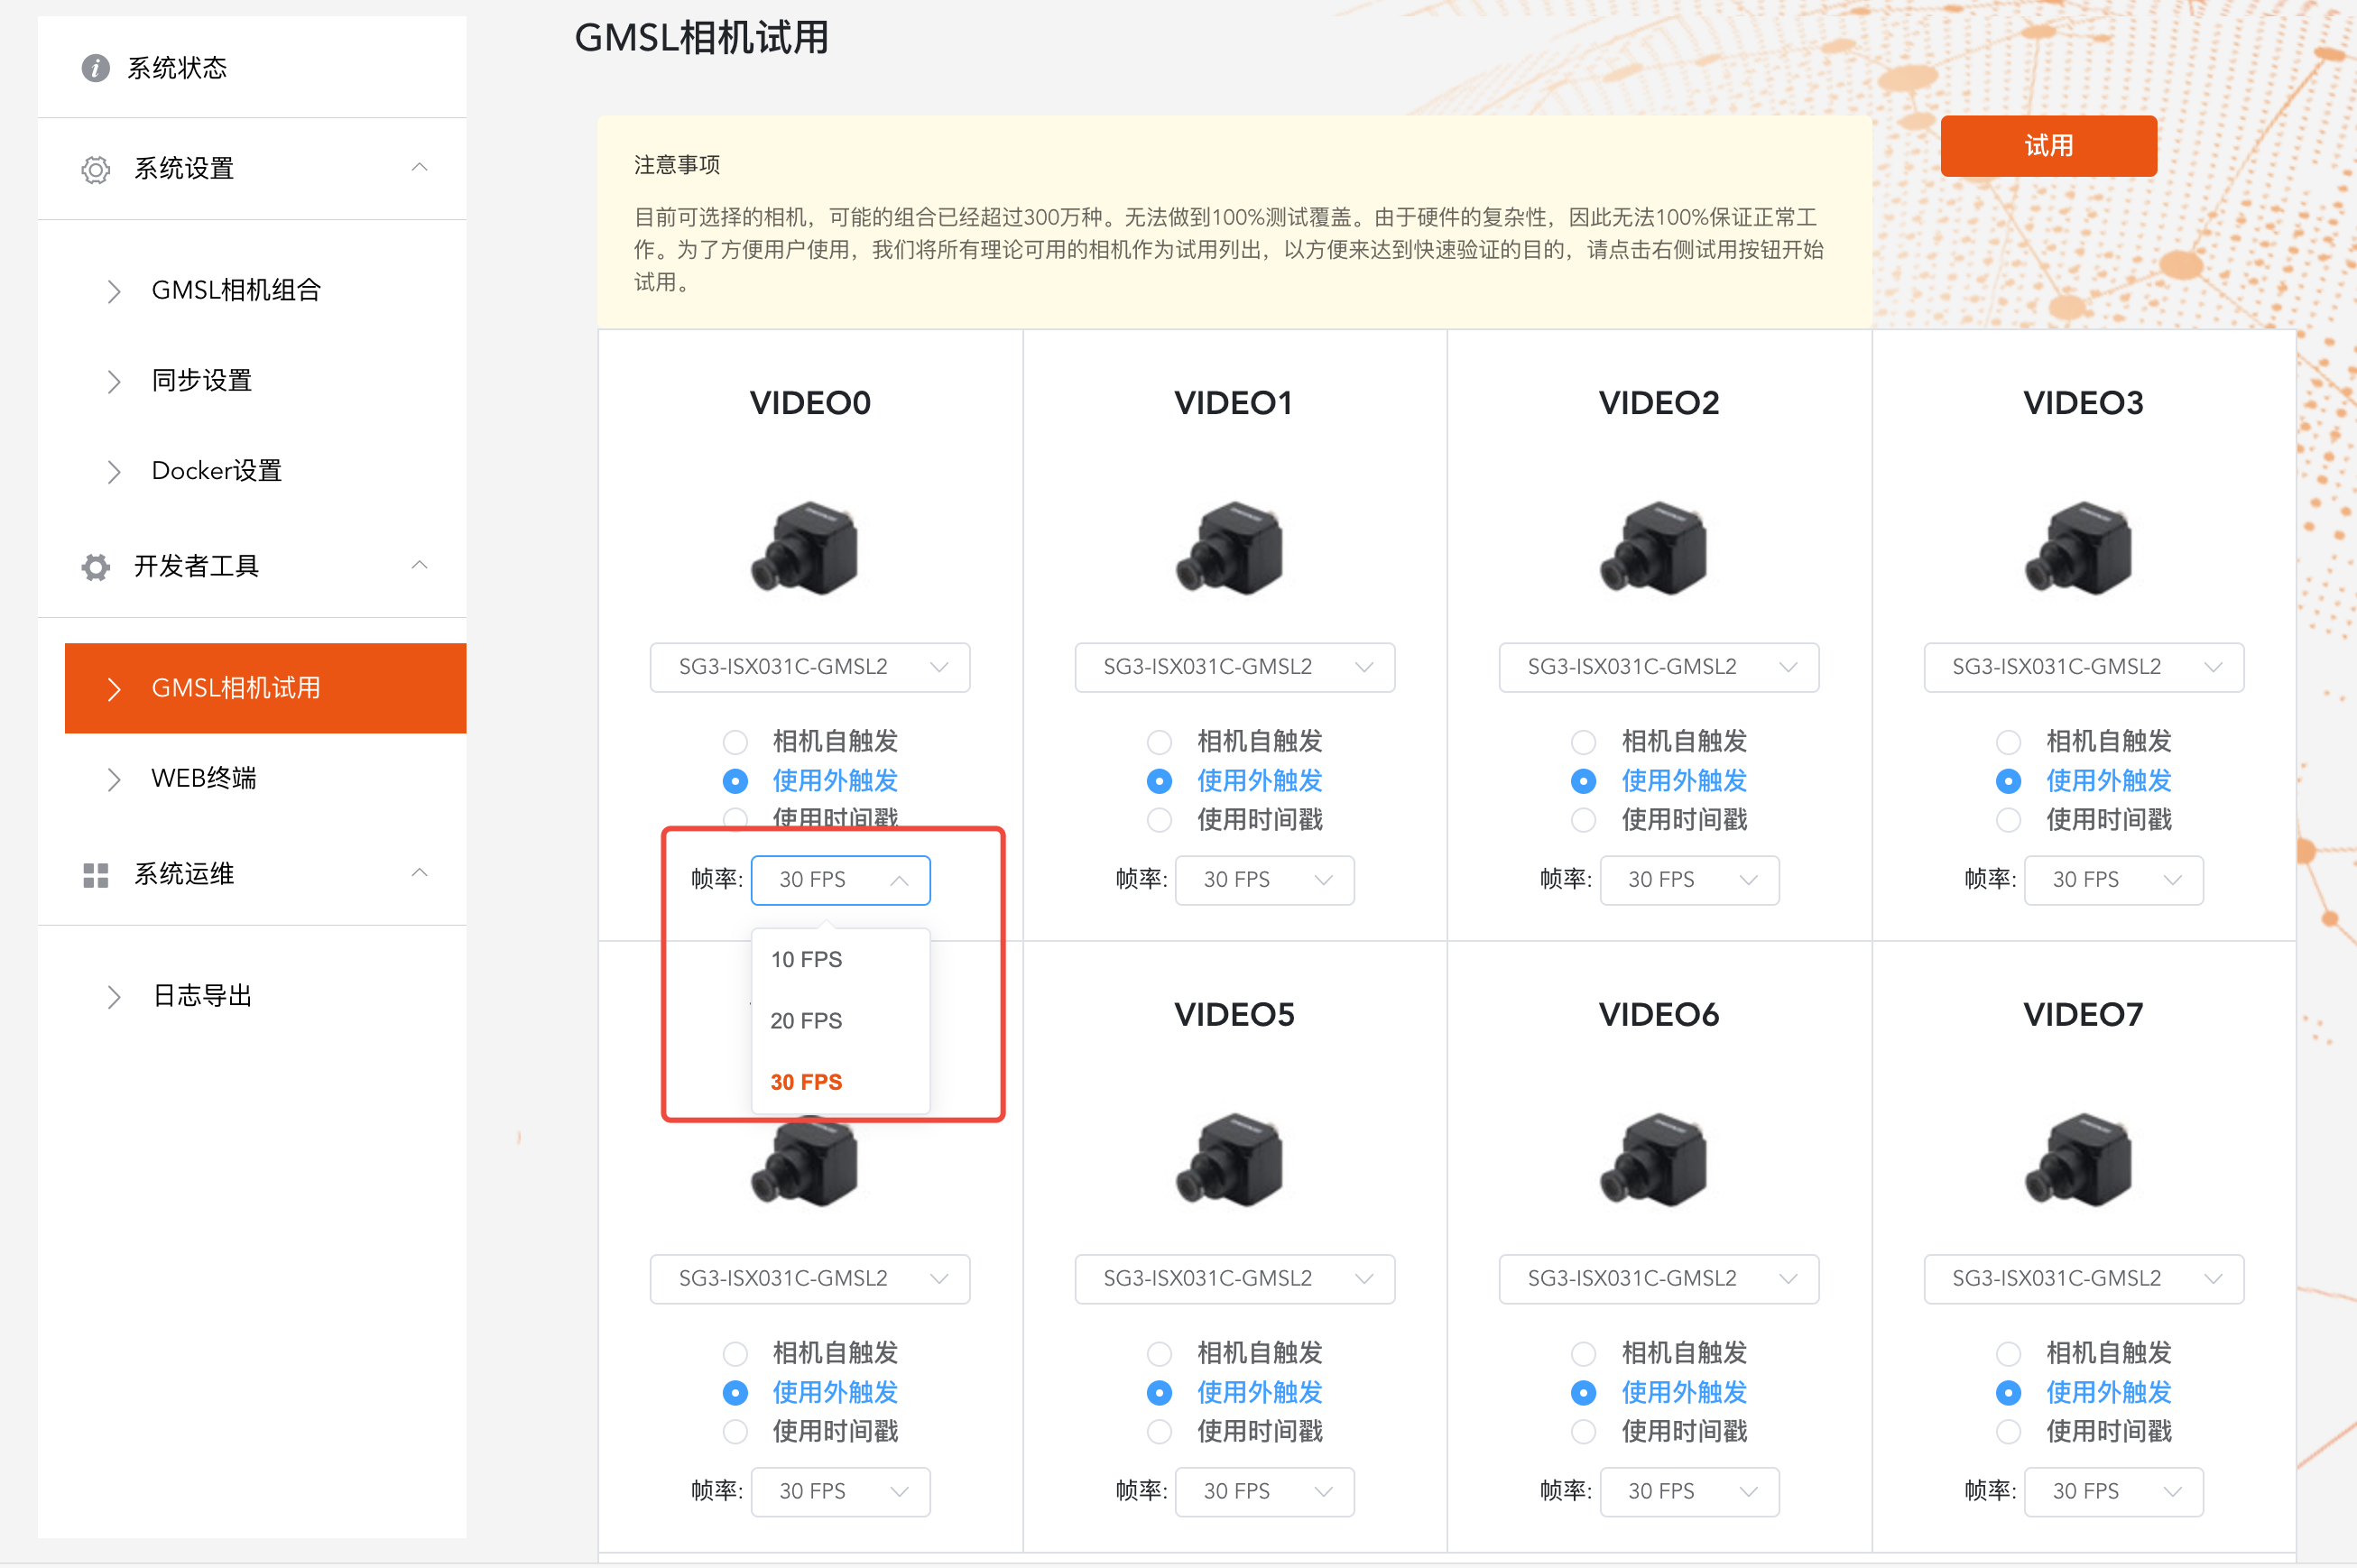
In the external trigger mode, you can select the supported trigger frequencies.
Since the trigger is the same for all cameras, the selectable frequencies are the trigger frequencies commonly supported by all cameras.
How to verify that the external trigger is successful#
Condition 1: The camera images can be obtained normally#
gst-launch-1.0 -v v4l2src device="/dev/video1" ! video/x-raw,width=1280,height=720,format=UYVY ! xvimagesink
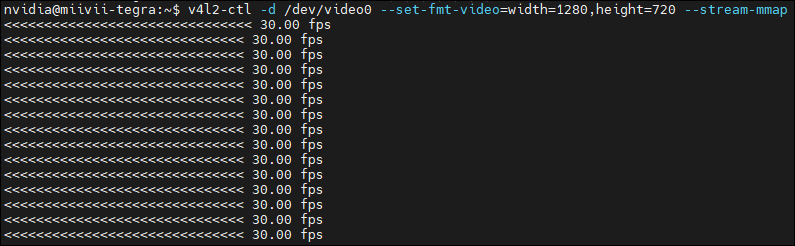
Condition 2: The camera frame rate is consistent with the set trigger frequency.#
You can use the v4l-utils tool in Linux to verify whether the corresponding video port is outputting images normally and whether the frame rate is normal.
Install the v4l-utils tool.
# Update the Ubuntu software source
sudo apt update

# Install tools
sudo apt install v4l-utils
Use this tool to obtain the output images and frame rate based on the resolution of the camera used and the insertion position.
# Take the camera with video0 and 1280x720 resolution as an example
v4l2-ctl -d /dev/video0 --set-fmt-video=width=1920,height=1080,pixelformat=UYVY --stream-mmap
Video output#
You can use the following commands to quickly open the camera to confirm the effect.
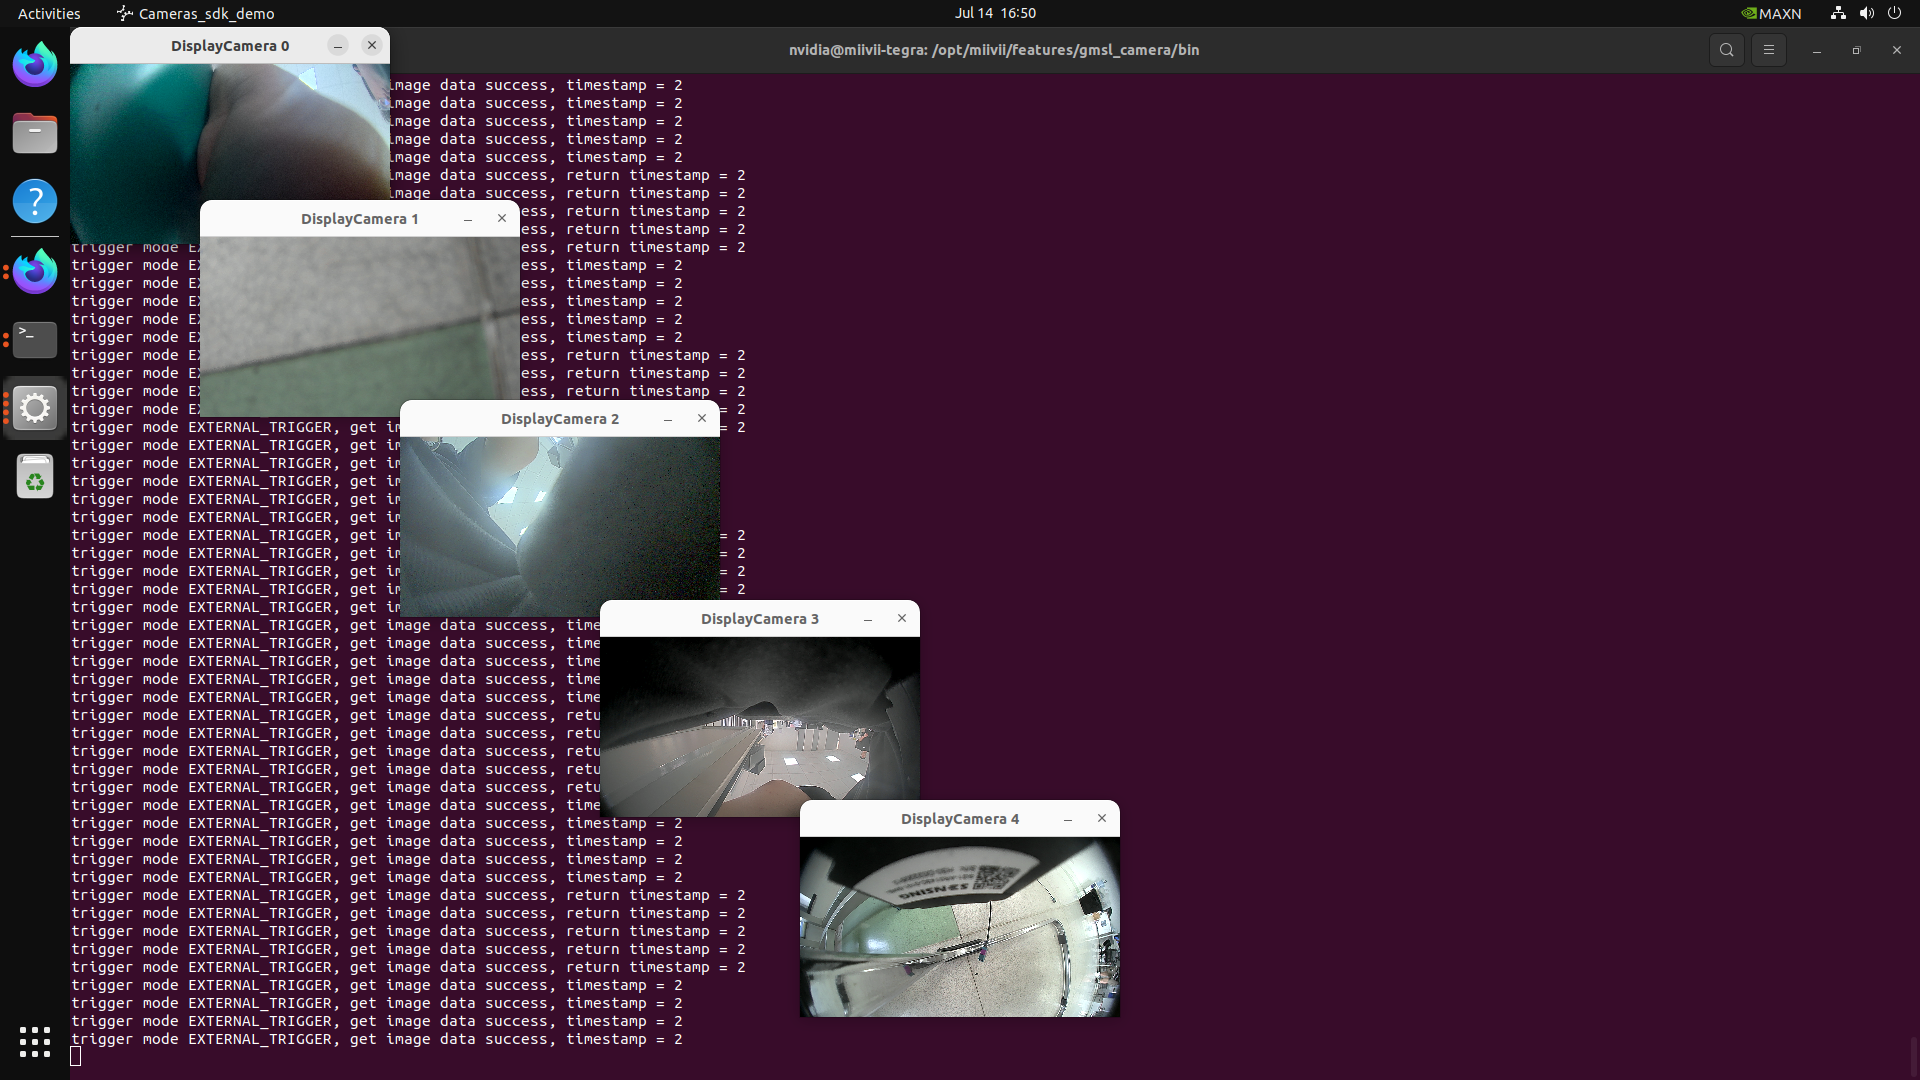
Method 1: Quickly turn on the camera without entering parameters#
Light up the camera#
sudo chmod +x /opt/miivii/features/gmsl_camera/bin/cameras_sdk_demo
cd /opt/miivii/features/gmsl_camera/bin/
# Turn on cameras (Automatically turn on all cameras. To turn on a specific camera, specify the channel number)
./cameras_sdk_demo
#
Method 2: Enter camera parameters to turn on the camera#
Display a single-channel 720P camera#
gst-launch-1.0 -v v4l2src device="/dev/video1" ! video/x-raw,width=1280,height=720,format=UYVY ! xvimagesink
Display a single 1080P camera#
gst-launch-1.0 -v v4l2src device="/dev/video0" ! video/x-raw,width=1920,height=1080,format=UYVY ! xvimagesink
Problem troubleshooting#
The camera shows no image.#
Check if the camera lens cap is open.
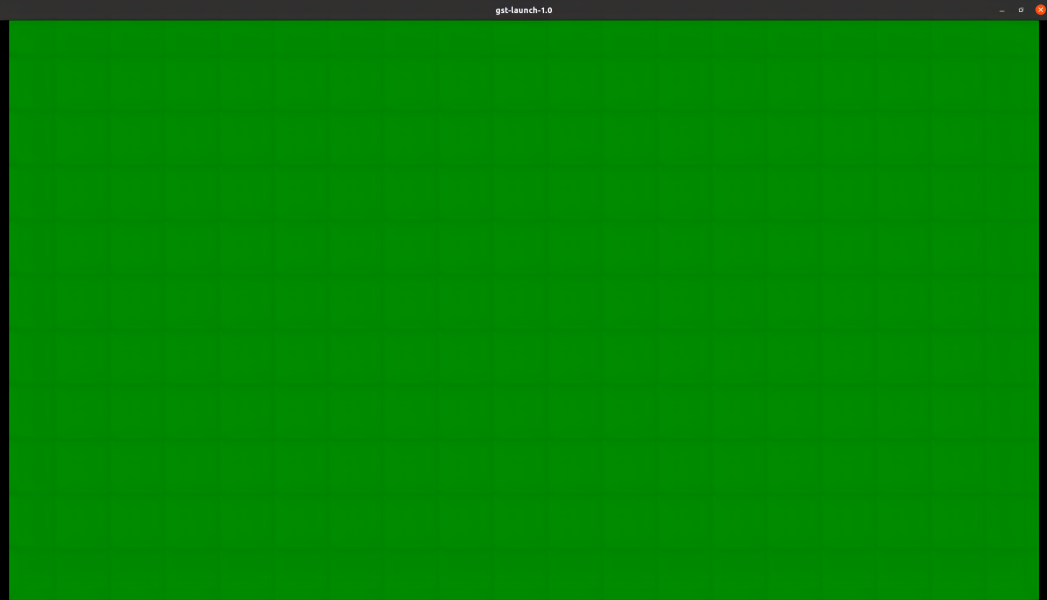
The camera shows a green screen#
Check if the camera only supports self - triggering mode. If so, refer to the advanced section.
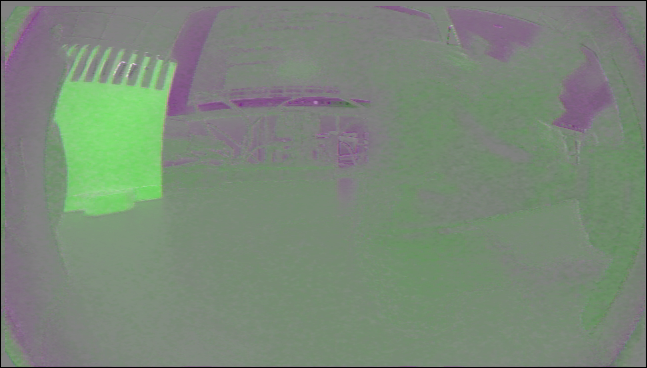
The color displayed by the camera is incorrect.#
When the camera image format does not match, the following effects will occur.
At this time, it is necessary to check whether the picture format is set correctly.
Troubleshooting of GMSL Camera Issues#
Principle#
Miwen only ensures that the frame rate of the data obtained from the hardware interface is normal. The calculation frame rate of the program designed by the user themselves cannot be used as a standard to judge abnormalities. The commonly used tools in the industry or the standards recognized by everyone should be used for testing. It is recommended to use the v4l2-ctl command (installation command: sudo apt install v4l-utils) for frame rate testing.
Specific methods for troubleshooting#
Phenomenon 1: The camera can be turned on normally, but the image frame rate does not match the frame rate specified in the camera manual.#
Check item 1: Use the v4l2-ctl tool to verify image output#
Plug the camera into the Miwen device and correctly configure the camera model in websetting. Open the terminal and enter the command:
v4l2-ctl --verbose -d /dev/video0 --set-fmt-video=width=1920,height=1080,pixelformat=UYVY --stream-mmap
In the above instructions, if the camera resolution is 1920x1080 and the inserted camera port is video0, customers can modify them according to their actual situation.
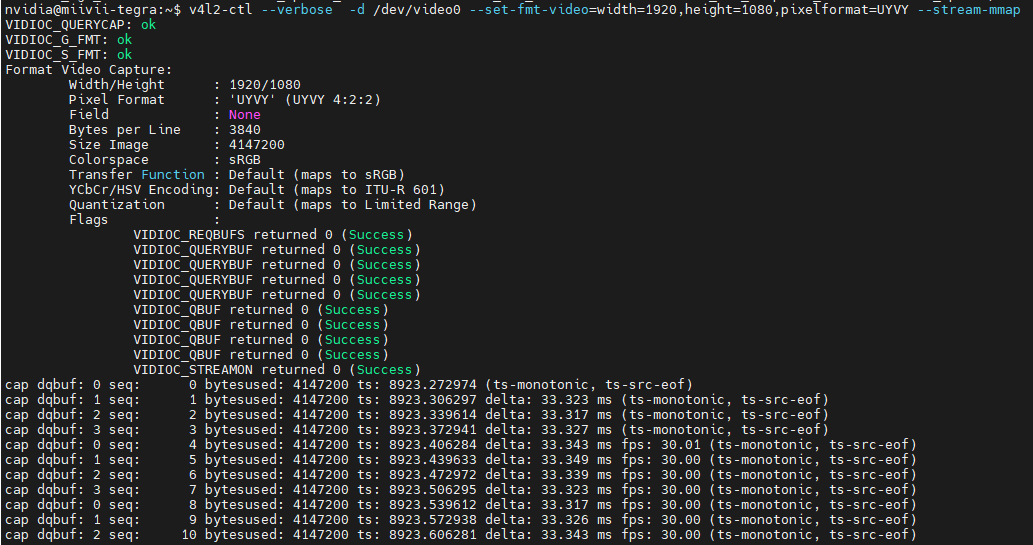
As shown in the above figure, ts: 33.327ms means the camera frame rate is 30Hz.
When executed multiple times, if the frame rate using v4l2-ctl does not match the camera manual, it is recommended that the customer communicate with the camera manufacturer to check if the firmware version is correct.
If there is a frame dropping issue, it is recommended to check the hardware link connection. If the hardware link is normal, execute “Troubleshooting Item 2: Collect log information”.
Check item 2: Capture logs#
After connecting the device to the external network, open the terminal and enter:
curl -sSL https://doc.miivii.com/scripts/run_miivii_diagnostic.sh | sudo bash -s gmsl
And export the logs and the files under /var/log, upload them to the fault work order, and hand them over to Miwen technical support.
Phenomenon 2: The camera cannot modify the frame rate#
Check item 1: Confirm whether the camera supports external triggering#
Step 1: Ask the camera manufacturer whether the camera supports external triggering.#
If external triggering is supported, execute “Check Item 2: Use the v4l2-ctl tool to verify if the frame rate has been modified”.
If external triggering is not supported, modifying the frame rate is not supported.
Check item 2: Use the v4l2-ctl tool to verify whether the frame rate has been modified#
Step 1: Same as “Troubleshooting Step 1” in “Phenomenon 1”#
If it is confirmed that the modification was not successful, then execute “Troubleshooting Item 3”.
If the frame rate matches the modified frame rate, it is necessary to check your own application.
Check item 3: Make minor adjustments to the frame rate and try to see if the modification can be successful.#
Step 1: Use sdkdemo to modify the frame rate within a small range (frame rates that differ from the default frame rate by 5 FPS or less)#
If the modification is successful, it is recommended that the customer consult the camera manufacturer about the range of frame rate modifications supported by the camera firmware.
If the modification is unsuccessful, execute “Check Item 4: Ensure that the synchronization signal of the camera is outputting normally”.
Root cause explanation:
Due to CMOS hardware limitations, even different products from the same camera manufacturer may support different frame rates for camera modifications. Here is a general distinction: all cameras that support external triggering can be referenced (distinguished by CMOS suppliers):
1 2 The minimum frame rate of OV camera’s CMOS is usually half of the default plus 1. How to identify if it is an OV CMOS? For example: The camera name contains OX08B/OX03C/OV10640 and other terms with OX/OV. 2 ONSEMI’s CMOS usually supports frame rate adjustment from 1-30FPS. How to identify if it is an ONSEMI CMOS? For example: The camera name contains AR0233/AR0820/AR0147 and other terms with AR. 2 SONY’s CMOS is quite special and has no specific characteristics. Common ones such as the IMX series usually only support fixed frame rate output (e.g., IMX390, IMX477, IMX728), while series like ISX usually support half of the default frame rate plus 1 (e.g., ISX031, ISX021).
Check item 4: Ensure that the synchronization signal of the camera is outputting normally#
Step 1: Check if the SDK is running properly#
Check if there are any error messages in the terminal.
Use sdkdemo to print timestamps and check if the triggering is normal.
If there is no error message and the timestamp is normal, it is recommended that the customer ask the camera manufacturer whether this model of camera supports modifying the frame rate.
If there is an error message, execute “Troubleshooting Item 5 - Step 2: Capture log information”.
Check item 5: Re-flash the image to verify if it is caused by the software environment#
Step 1: Flash the image#
Method for flashing the image:https://doc.miivii.com/Apex-AD10-User-Manual-CH/wiki/Apex-AD10-%E5%9B%BA%E4%BB%B6%E7%83%A7%E5%86%99.html。
After flashing the image, if the frame rate can be modified normally, it indicates that the issue is caused by the system software environment, and the customer needs to check the software environment themselves.
After flashing the image, if the frame rate still cannot be modified, execute “Step 2”.
Step 2: Capture the log#
After connecting the device to the external network, open the terminal and enter:
curl -sSL https://doc.miivii.com/scripts/run_miivii_diagnostic.sh | sudo bash -s gmsl
And export the logs and the files under /var/log, upload them to the fault work order, and submit them to Miwen technical support.