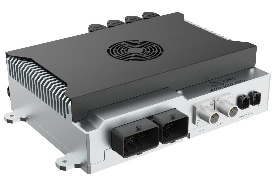
Apex AD10 RS422/485 Usage#
RS422/485 Usage#
Haredware Speciation#

RS485/422 DB9 Port Pin Definition:

Pin |
Signal |
|---|---|
1 |
UART(422T+/485) |
2 |
UART(422T-/485) |
3 |
UART(422R+) |
4 |
UART(422R-) |
5 |
GND |
Function vs Device Node#
Function |
Explanation |
Device Node |
|---|---|---|
UART(422/485)A |
Orin 422/485 A |
/dev/ttyUART_485_422_A |
UART(422/485)B |
Orin 422/485 B |
/dev/ttyUART_485_422_B |
Method of Application#
Use connector 1, connect to PC.
Use connector 2, connect to DB9 female-female cross connector 3.
Use connector 3, connect to DB9 RS422/485 port want to use.

Preparation#
PC(Ubuntu System)
#Install
sudo apt-get install putty -y
Device
#install
sudo apt-get install putty -y
Receive-Send Test#
Device
#Open putty
sudo putty
After opening Putty, configure the parameters in “Session”. Enter the device node in “Serial line” and set the speed to 115200 in “Speed”. Choose “Serial” in “Connection type”.

Configure the parameters in “Terminal”, select “Force on” in “Line discipline options”, and then click “Open” to enter the data transfer interface.

PC
Obtaining the UART device node on the PC side.
#After connecting the USB to serial module to the PC side, execute the command, and the output result is the UART device node.
 ls /dev | grep -E 'ttyUSB[0-9]+' | sort -V | tail -n 1

#Open putty
sudo putty
After opening Putty, configure the parameters in “Session”. Enter the device node in “Serial line” and set the speed to 115200 in “Speed”. Choose “Serial” in “Connection type”.

Configure the parameters in “Terminal”, select “Force on” in “Line discipline options”, and then click “Open” to enter the data transfer interface.

Use PuTTY to determine whether the send and receive operations are successful.
Observe the transmission interfaces on both the device side and the PC side. Enter any information in either interface, and if both interfaces display the same content, it means that the send and receive operations are successful.
PC

Device

